CONSTRUCTING THE HOLDER
STEP-BY-STEP INSTRUCTIONS
A B
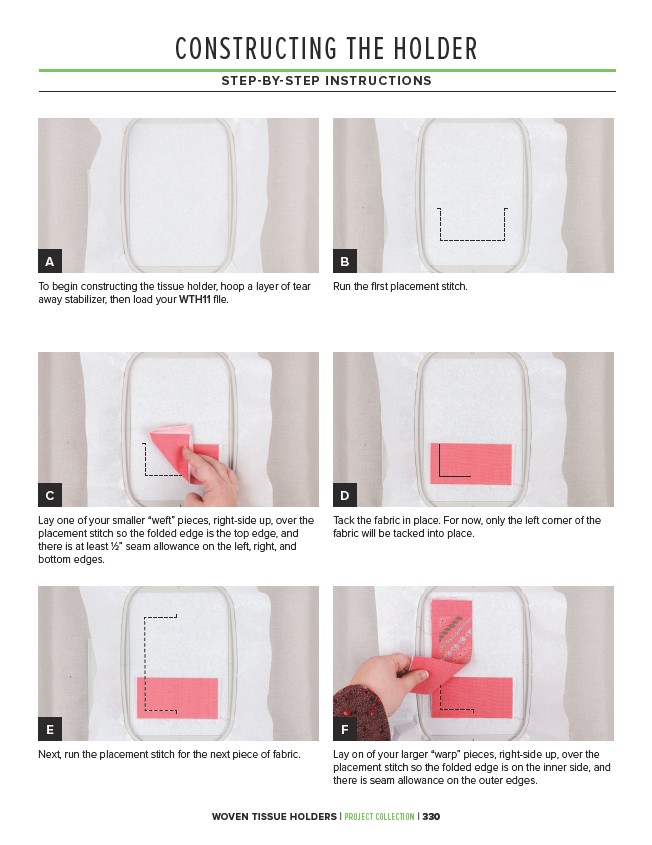
Run the first placement stitch.
To begin constructing the tissue holder, hoop a layer of tear
away stabilizer, then load your WTH11 file.
C D
Lay one of your smaller “weft” pieces, right-side up, over the
placement stitch so the folded edge is the top edge, and
there is at least 1⁄2” seam allowance on the left, right, and
bottom edges.
Tack the fabric in place. For now, only the left corner of the
fabric will be tacked into place.
E F
Next, run the placement stitch for the next piece of fabric. Lay on of your larger “warp” pieces, right-side up, over the
placement stitch so the folded edge is on the inner side, and
there is seam allowance on the outer edges.
WOVEN TISSUE HOLDERS | PROJECT COLLECTION | 330