COMPLETING THE BAG
STEP-BY-STEP INSTRUCTIONS
A B
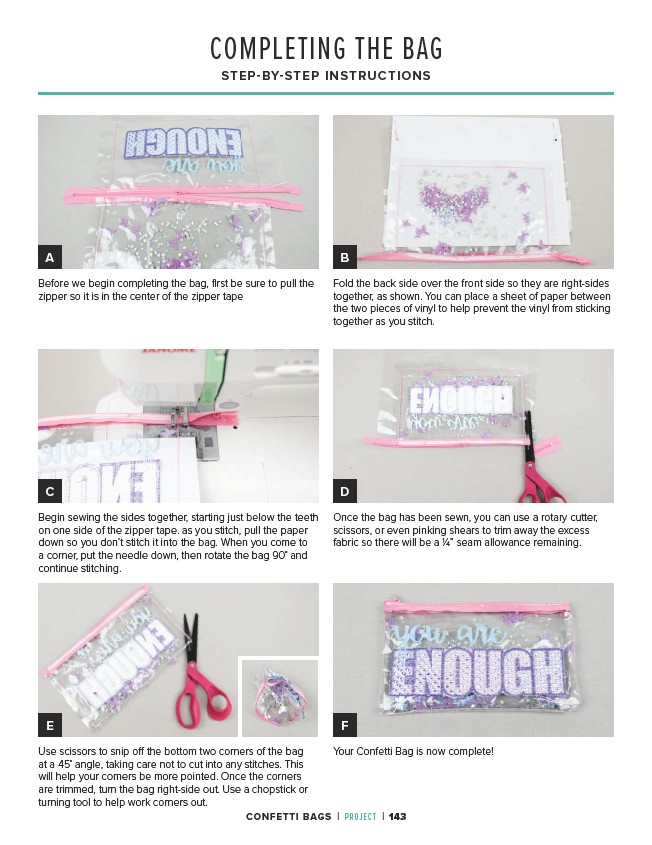
Fold the back side over the front side so they are right-sides
together, as shown. You can place a sheet of paper between
the two pieces of vinyl to help prevent the vinyl from sticking
together as you stitch.
C D
Begin sewing the sides together, starting just below the teeth
on one side of the zipper tape. as you stitch, pull the paper
down so you don’t stitch it into the bag. When you come to
a corner, put the needle down, then rotate the bag 90˚ and
continue stitching.
Once the bag has been sewn, you can use a rotary cutter,
scissors, or even pinking shears to trim away the excess
fabric so there will be a 1⁄4” seam allowance remaining.
E F
Use scissors to snip off the bottom two corners of the bag
at a 45˚ angle, taking care not to cut into any stitches. This
will help your corners be more pointed. Once the corners
are trimmed, turn the bag right-side out. Use a chopstick or
turning tool to help work corners out.
Your Confetti Bag is now complete!
Before we begin completing the bag, first be sure to pull the
zipper so it is in the center of the zipper tape
CONFETTI BAGS | PROJECT | 143