D I Y A N I TA
CREATING YOUR DESIGN
STEP-BY-STEP INSTRUCTIONS
1 2
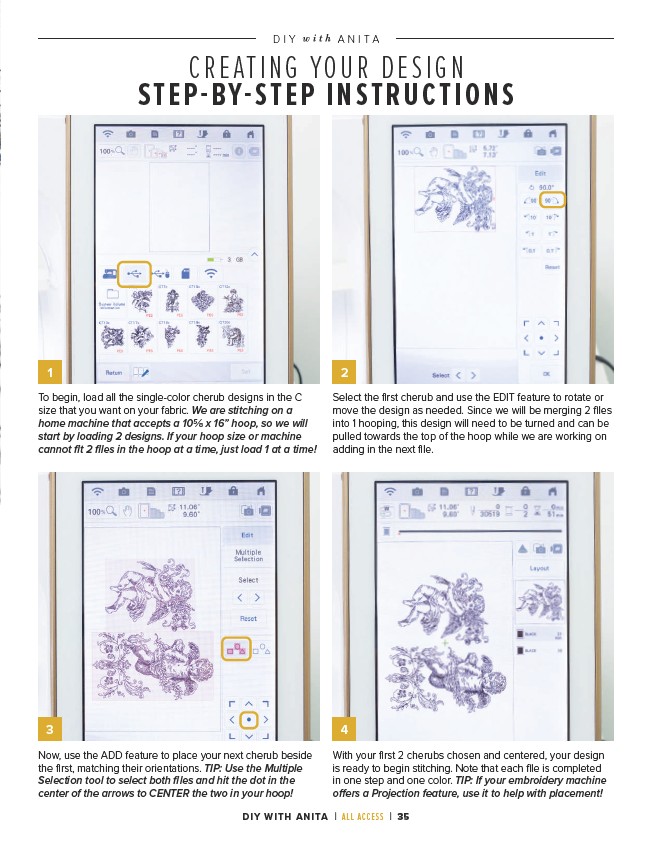
To begin, load all the single-color cherub designs in the C
size that you want on your fabric. We are stitching on a
home machine that accepts a 105⁄8 x 16” hoop, so we will
start by loading 2 designs. If your hoop size or machine
cannot fit 2 files in the hoop at a time, just load 1 at a time!
Select the first cherub and use the EDIT feature to rotate or
move the design as needed. Since we will be merging 2 files
into 1 hooping, this design will need to be turned and can be
pulled towards the top of the hoop while we are working on
adding in the next file.
3 4
Now, use the ADD feature to place your next cherub beside
the first, matching their orientations. TIP: Use the Multiple
Selection tool to select both files and hit the dot in the
center of the arrows to CENTER the two in your hoop!
With your first 2 cherubs chosen and centered, your design
is ready to begin stitching. Note that each file is completed
in one step and one color. TIP: If your embroidery machine
offers a Projection feature, use it to help with placement!
DIY WITH ANITA | ALL ACCESS | 35