ASSEMBLING MOTHS 1-6
STEP-BY-STEP INSTRUCTIONS
A B
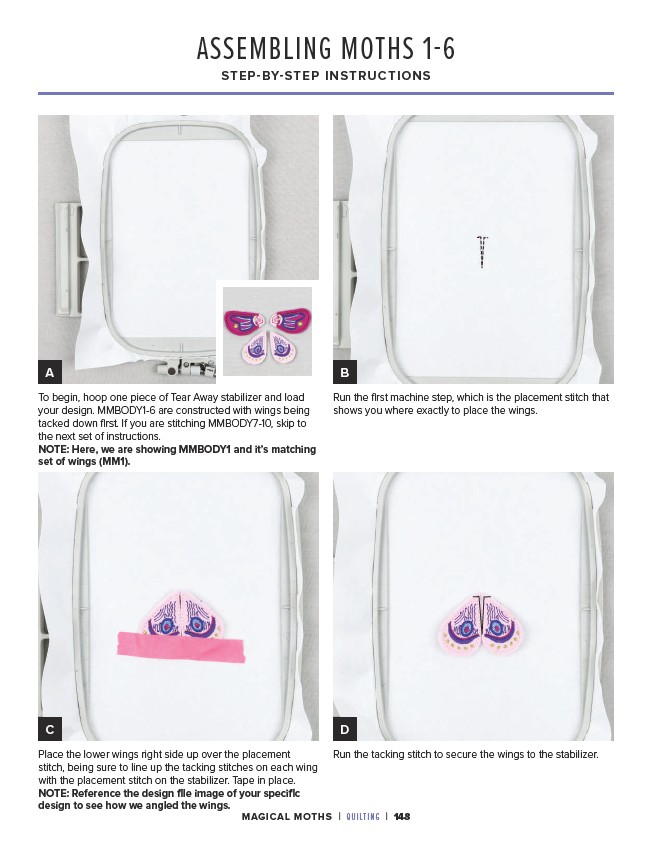
Run the first machine step, which is the placement stitch that
shows you where exactly to place the wings.
C D
Place the lower wings right side up over the placement
stitch, being sure to line up the tacking stitches on each wing
with the placement stitch on the stabilizer. Tape in place.
NOTE: Reference the design file image of your specific
design to see how we angled the wings.
Run the tacking stitch to secure the wings to the stabilizer.
To begin, hoop one piece of Tear Away stabilizer and load
your design. MMBODY1-6 are constructed with wings being
tacked down first. If you are stitching MMBODY7-10, skip to
the next set of instructions.
NOTE: Here, we are showing MMBODY1 and it’s matching
set of wings (MM1).
MAGICAL MOTHS | QUILTING | 148