M N
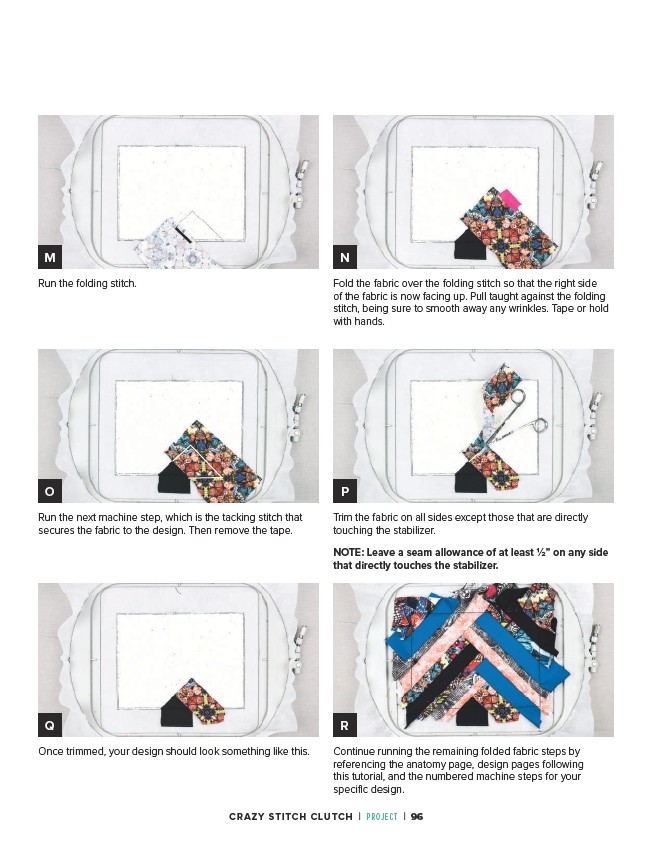
Fold the fabric over the folding stitch so that the right side
of the fabric is now facing up. Pull taught against the folding
stitch, being sure to smooth away any wrinkles. Tape or hold
with hands.
O P
Run the next machine step, which is the tacking stitch that
secures the fabric to the design. Then remove the tape.
Trim the fabric on all sides except those that are directly
touching the stabilizer.
NOTE: Leave a seam allowance of at least 1⁄2” on any side
that directly touches the stabilizer.
Q R
Once trimmed, your design should look something like this. Continue running the remaining folded fabric steps by
referencing the anatomy page, design pages following
this tutorial, and the numbered machine steps for your
specific design.
Run the folding stitch.
CRAZY STITCH CLUTCH | PROJECT | 96