G H
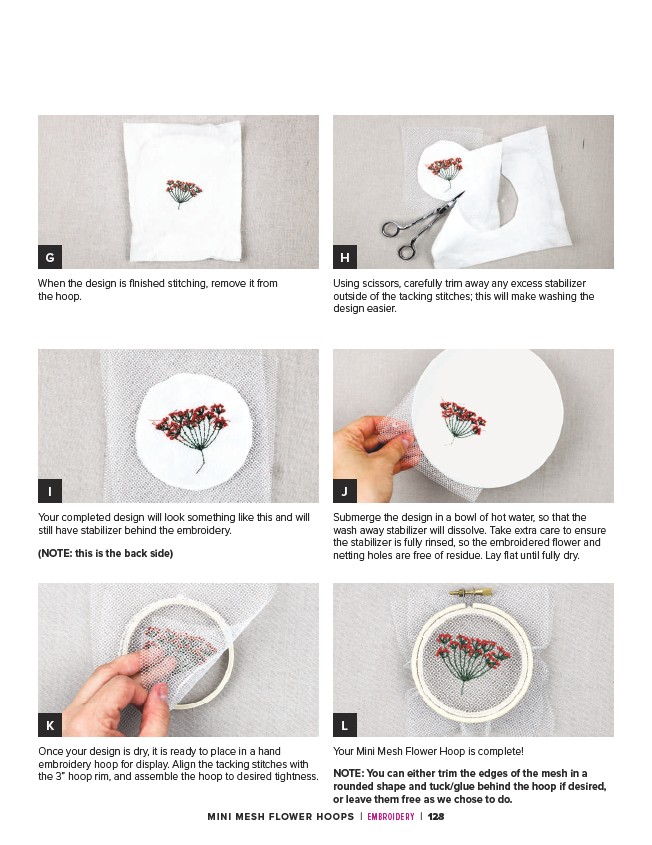
Using scissors, carefully trim away any excess stabilizer
outside of the tacking stitches; this will make washing the
design easier.
I J
Your completed design will look something like this and will
still have stabilizer behind the embroidery.
(NOTE: this is the back side)
Submerge the design in a bowl of hot water, so that the
wash away stabilizer will dissolve. Take extra care to ensure
the stabilizer is fully rinsed, so the embroidered flower and
netting holes are free of residue. Lay flat until fully dry.
K L
Once your design is dry, it is ready to place in a hand
embroidery hoop for display. Align the tacking stitches with
the 3” hoop rim, and assemble the hoop to desired tightness.
Your Mini Mesh Flower Hoop is complete!
NOTE: You can either trim the edges of the mesh in a
rounded shape and tuck/glue behind the hoop if desired,
or leave them free as we chose to do.
When the design is finished stitching, remove it from
the hoop.
MINI MESH FLOWER HOOPS | EMBROIDERY | 128