D I Y A N I TA
STEP-BY-STEP
INSTRUCTIONS
1 2
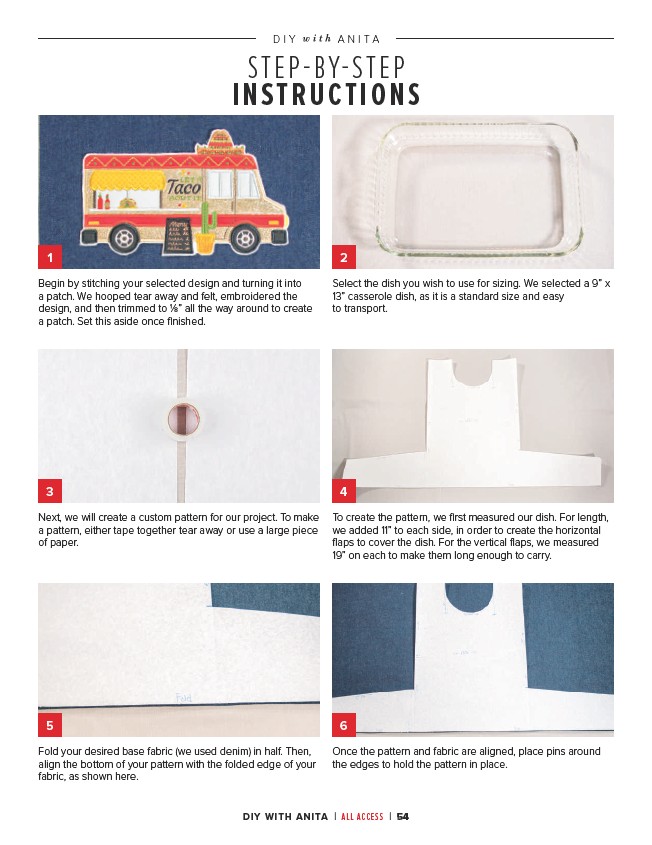
Select the dish you wish to use for sizing. We selected a 9” x
13” casserole dish, as it is a standard size and easy
to transport.
Begin by stitching your selected design and turning it into
a patch. We hooped tear away and felt, embroidered the
design, and then trimmed to 1⁄8” all the way around to create
a patch. Set this aside once finished.
3 4
Next, we will create a custom pattern for our project. To make
a pattern, either tape together tear away or use a large piece
of paper.
To create the pattern, we first measured our dish. For length,
we added 11” to each side, in order to create the horizontal
flaps to cover the dish. For the vertical flaps, we measured
19” on each to make them long enough to carry.
5 6
Fold your desired base fabric (we used denim) in half. Then,
align the bottom of your pattern with the folded edge of your
fabric, as shown here.
Once the pattern and fabric are aligned, place pins around
the edges to hold the pattern in place.
DIY WITH ANITA | ALL ACCESS | 54