ANATOMY OF THE DESIGN
These designs have been specially digitized to create a
unique looping fringe effect! When your design first stitches
out, you’ll be able to easily spot the areas that will end up
fringed by their series of wide, satin stitched rows. If you look
closely while the designs run, you’ll also notice a skinnier,
anchoring satin stitches that will help secure and hold the
looped threads once fringed. The end results are loopy, fluffy
fringe, perfect for added dimension!
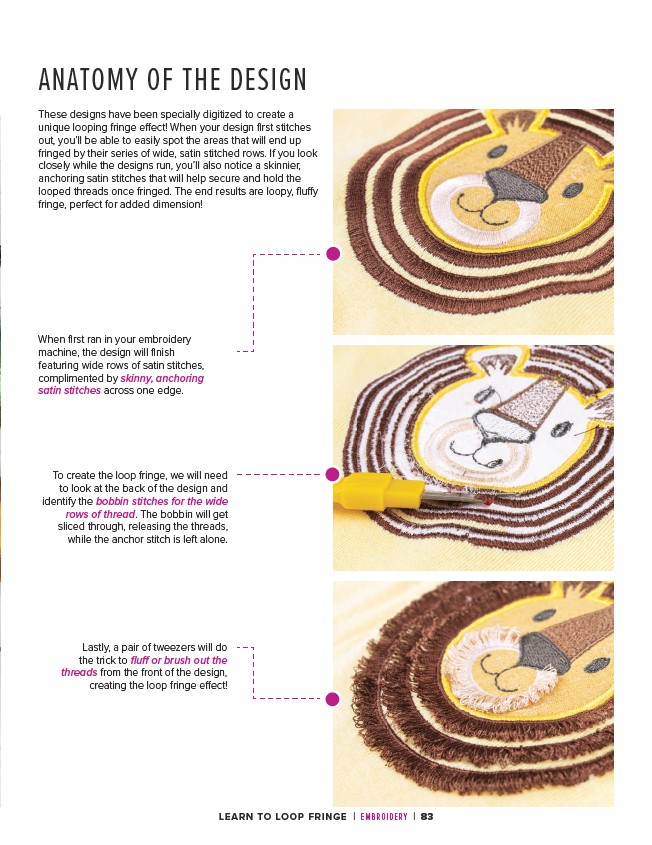
When first ran in your embroidery
machine, the design will finish
featuring wide rows of satin stitches,
complimented by skinny, anchoring
satin stitches across one edge.
To create the loop fringe, we will need
to look at the back of the design and
identify the bobbin stitches for the wide
rows of thread. The bobbin will get
sliced through, releasing the threads,
while the anchor stitch is left alone.
Lastly, a pair of tweezers will do
the trick to fluff or brush out the
threads from the front of the design,
creating the loop fringe effect!
LEARN TO LOOP FRINGE | EMBROIDERY | 83