FRINGE EMBROIDERY LOOP FRINGE EMBROIDERY
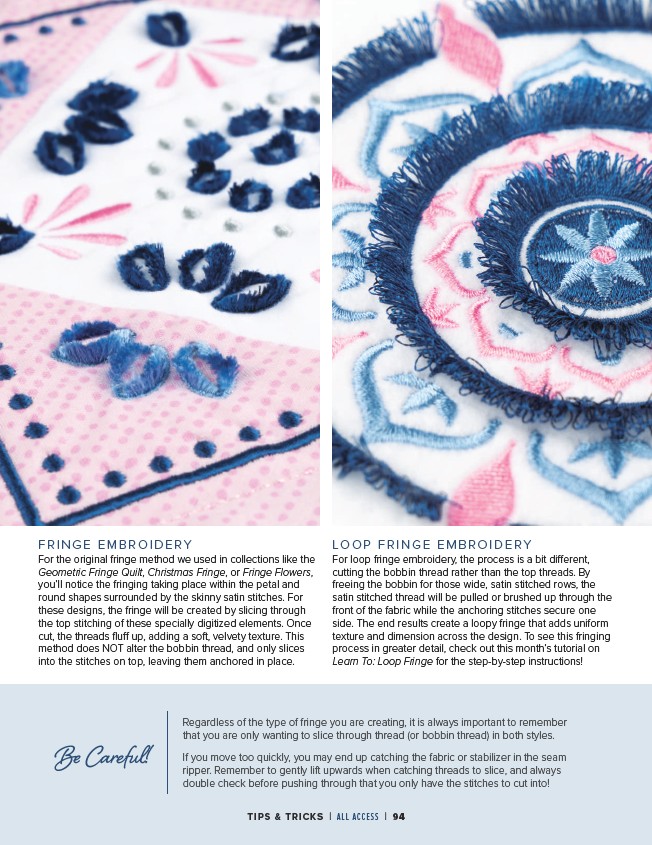
For the original fringe method we used in collections like the
Geometric Fringe Quilt, Christmas Fringe, or Fringe Flowers,
you’ll notice the fringing taking place within the petal and
round shapes surrounded by the skinny satin stitches. For
these designs, the fringe will be created by slicing through
the top stitching of these specially digitized elements. Once
cut, the threads fluff up, adding a soft, velvety texture. This
method does NOT alter the bobbin thread, and only slices
into the stitches on top, leaving them anchored in place.
Be Careful!
For loop fringe embroidery, the process is a bit different,
cutting the bobbin thread rather than the top threads. By
freeing the bobbin for those wide, satin stitched rows, the
satin stitched thread will be pulled or brushed up through the
front of the fabric while the anchoring stitches secure one
side. The end results create a loopy fringe that adds uniform
texture and dimension across the design. To see this fringing
process in greater detail, check out this month’s tutorial on
Learn To: Loop Fringe for the step-by-step instructions!
Regardless of the type of fringe you are creating, it is always important to remember
that you are only wanting to slice through thread (or bobbin thread) in both styles.
If you move too quickly, you may end up catching the fabric or stabilizer in the seam
ripper. Remember to gently lift upwards when catching threads to slice, and always
double check before pushing through that you only have the stitches to cut into!
TIPS & TRICKS | ALL ACCESS | 94