PART III: FINISHING YOUR BAG
STEP-BY-STEP INSTRUCTIONS
A B
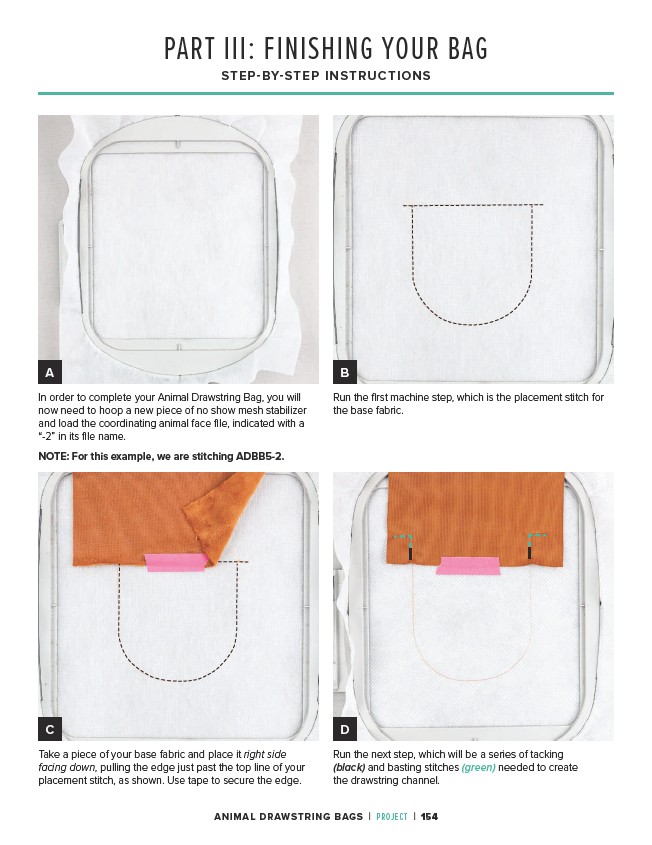
Run the first machine step, which is the placement stitch for
the base fabric.
D
In order to complete your Animal Drawstring Bag, you will
now need to hoop a new piece of no show mesh stabilizer
and load the coordinating animal face file, indicated with a
“-2” in its file name.
NOTE: For this example, we are stitching ADBB5-2.
Take a piece of your base fabric and place it right side
facing down, pulling the edge just past the top line of your
placement stitch, as shown. Use tape to secure the edge.
Run the next step, which will be a series of tacking
(black) and basting stitches (green) needed to create
the drawstring channel.
C
ANIMAL DRAWSTRING BAGS | PROJECT | 154