STITCHING THE ZIPPER FILE
STEP-BY-STEP INSTRUCTIONS
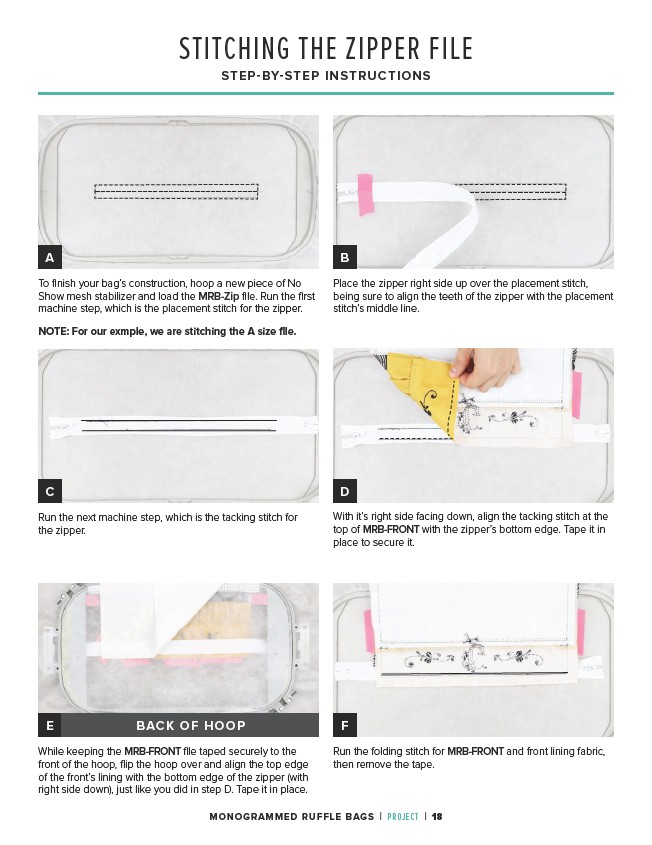
A B
Place the zipper right side up over the placement stitch,
being sure to align the teeth of the zipper with the placement
stitch’s middle line.
To finish your bag’s construction, hoop a new piece of No
Show mesh stabilizer and load the MRB-Zip file. Run the first
machine step, which is the placement stitch for the zipper.
NOTE: For our exmple, we are stitching the A size file.
C
Run the next machine step, which is the tacking stitch for
the zipper.
D
With it’s right side facing down, align the tacking stitch at the
top of MRB-FRONT with the zipper’s bottom edge. Tape it in
place to secure it.
E BACK OF HOOP
While keeping the MRB-FRONT file taped securely to the
front of the hoop, flip the hoop over and align the top edge
of the front’s lining with the bottom edge of the zipper (with
right side down), just like you did in step D. Tape it in place.
F
Run the folding stitch for MRB-FRONT and front lining fabric,
then remove the tape.
MONOGRAMMED RUFFLE BAGS | PROJECT | 18