STITCHING A DESIGN ONTO A MOUSE PAD
STEP-BY-STEP INSTRUCTIONS
A B
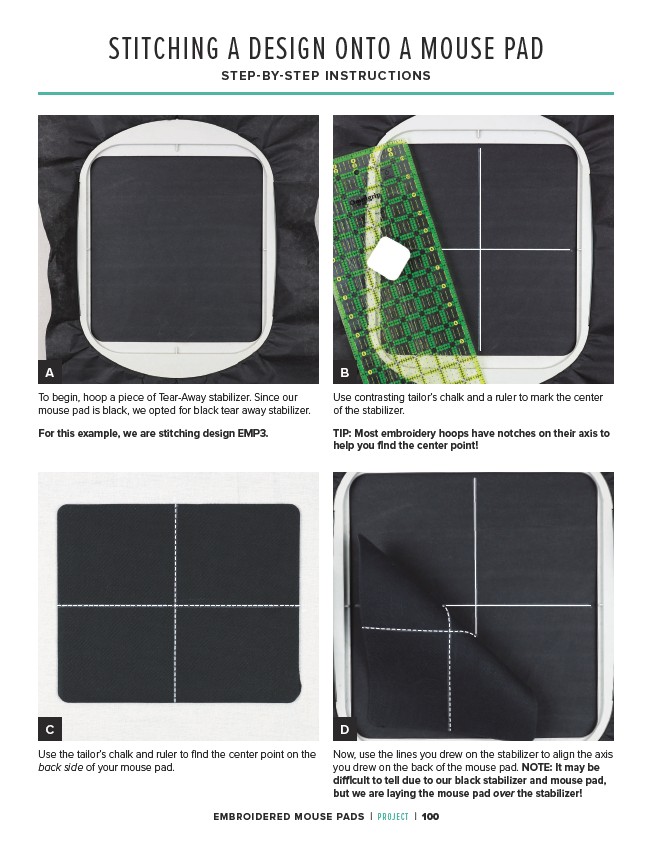
Use contrasting tailor’s chalk and a ruler to mark the center
of the stabilizer.
TIP: Most embroidery hoops have notches on their axis to
help you find the center point!
C D
Use the tailor’s chalk and ruler to find the center point on the
back side of your mouse pad.
Now, use the lines you drew on the stabilizer to align the axis
you drew on the back of the mouse pad. NOTE: It may be
difficult to tell due to our black stabilizer and mouse pad,
but we are laying the mouse pad over the stabilizer!
To begin, hoop a piece of Tear-Away stabilizer. Since our
mouse pad is black, we opted for black tear away stabilizer.
For this example, we are stitching design EMP3.
EMBROIDERED MOUSE PADS | PROJECT | 100