G H
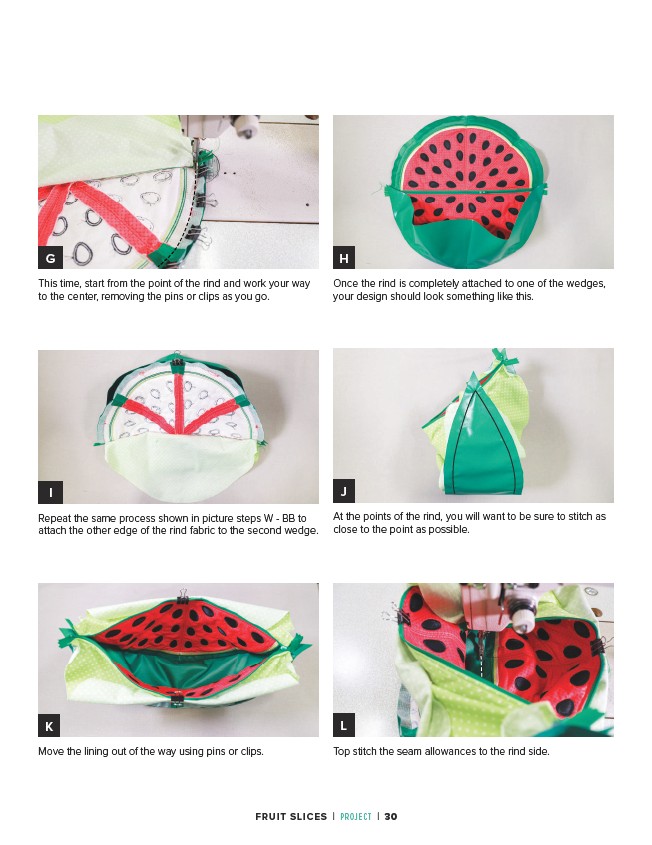
Move the lining out of the way using pins or clips.
At the points of the rind, you will want to be sure to stitch as
close to the point as possible.
Repeat the same process shown in picture steps W - BB to
attach the other edge of the rind fabric to the second wedge.
Once the rind is completely attached to one of the wedges,
your design should look something like this.
This time, start from the point of the rind and work your way
to the center, removing the pins or clips as you go.
I J
K
L
Top stitch the seam allowances to the rind side.
FRUIT SLICES | PROJECT | 30