M N
O P
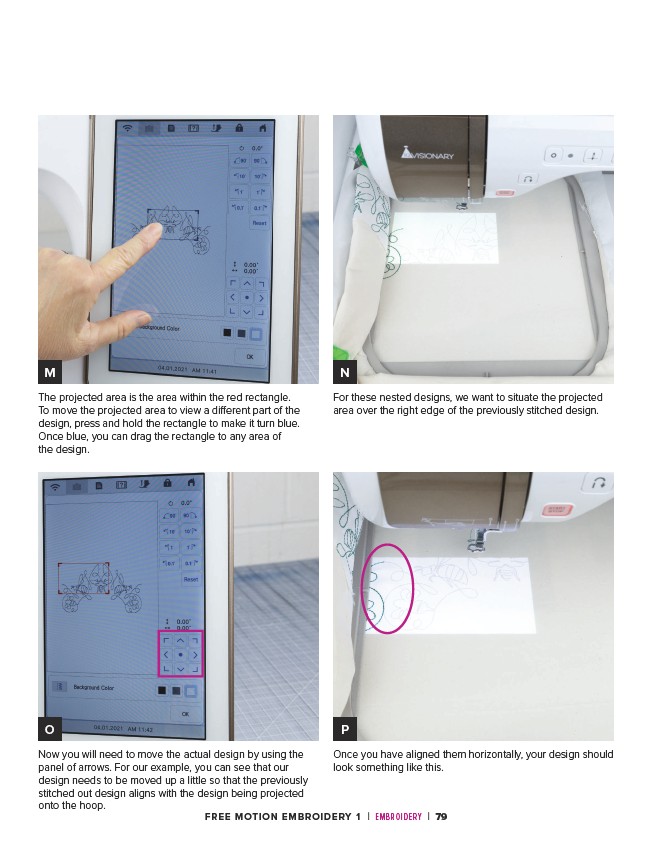
Now you will need to move the actual design by using the
panel of arrows. For our example, you can see that our
design needs to be moved up a little so that the previously
stitched out design aligns with the design being projected
onto the hoop.
For these nested designs, we want to situate the projected
area over the right edge of the previously stitched design.
Once you have aligned them horizontally, your design should
look something like this.
The projected area is the area within the red rectangle.
To move the projected area to view a different part of the
design, press and hold the rectangle to make it turn blue.
Once blue, you can drag the rectangle to any area of
the design.
FREE MOTION EMBROIDERY 1 | EMBROIDERY | 79