CREATING A CUP COZIE
STEP-BY-STEP INSTRUCTIONS
A B
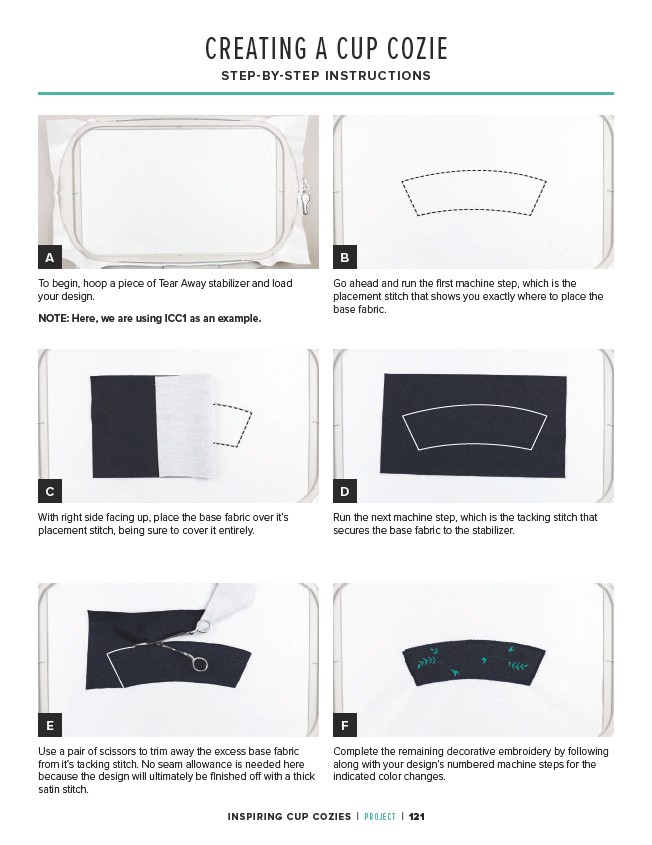
Go ahead and run the first machine step, which is the
placement stitch that shows you exactly where to place the
base fabric.
C D
With right side facing up, place the base fabric over it’s
placement stitch, being sure to cover it entirely.
Run the next machine step, which is the tacking stitch that
secures the base fabric to the stabilizer.
E F
Use a pair of scissors to trim away the excess base fabric
from it’s tacking stitch. No seam allowance is needed here
because the design will ultimately be finished off with a thick
satin stitch.
Complete the remaining decorative embroidery by following
along with your design’s numbered machine steps for the
indicated color changes.
To begin, hoop a piece of Tear Away stabilizer and load
your design.
NOTE: Here, we are using ICC1 as an example.
INSPIRING CUP COZIES | PROJECT | 121