CLUTCH CONSTRUCTION
STEP-BY-STEP INSTRUCTIONS
A B
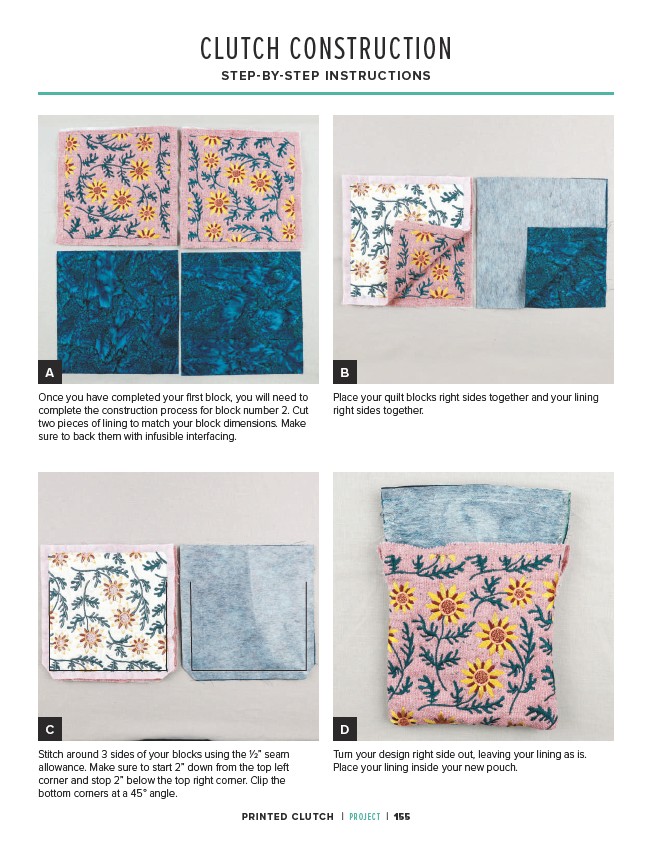
Place your quilt blocks right sides together and your lining
right sides together.
C D
Stitch around 3 sides of your blocks using the 1⁄2” seam
allowance. Make sure to start 2” down from the top left
corner and stop 2” below the top right corner. Clip the
bottom corners at a 45 ° angle.
Turn your design right side out, leaving your lining as is.
Place your lining inside your new pouch.
Once you have completed your first block, you will need to
complete the construction process for block number 2. Cut
two pieces of lining to match your block dimensions. Make
sure to back them with infusible interfacing.
PRINTED CLUTCH | PROJECT | 155