7 8
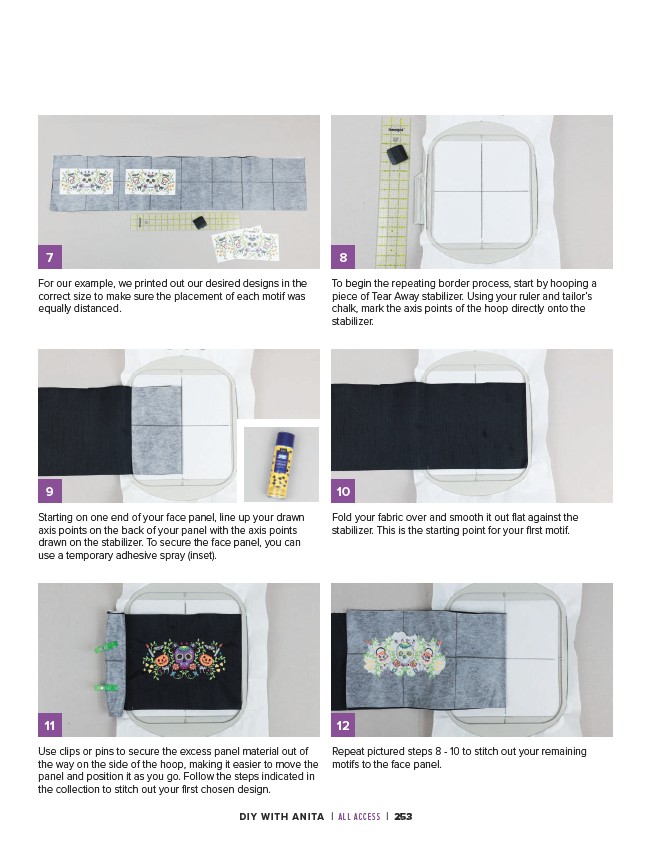
To begin the repeating border process, start by hooping a
piece of Tear Away stabilizer. Using your ruler and tailor’s
chalk, mark the axis points of the hoop directly onto the
stabilizer.
For our example, we printed out our desired designs in the
correct size to make sure the placement of each motif was
equally distanced.
9 10
Starting on one end of your face panel, line up your drawn
axis points on the back of your panel with the axis points
drawn on the stabilizer. To secure the face panel, you can
use a temporary adhesive spray (inset).
Fold your fabric over and smooth it out flat against the
stabilizer. This is the starting point for your first motif.
11 12
Use clips or pins to secure the excess panel material out of
the way on the side of the hoop, making it easier to move the
panel and position it as you go. Follow the steps indicated in
the collection to stitch out your first chosen design.
Repeat pictured steps 8 - 10 to stitch out your remaining
motifs to the face panel.
DIY WITH ANITA | ALL ACCESS | 253