13 14
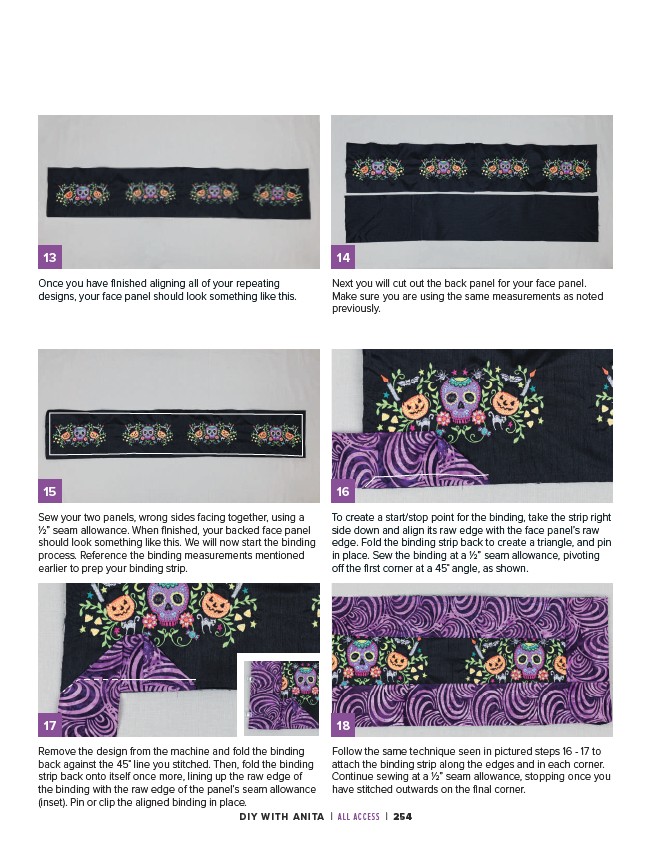
Next you will cut out the back panel for your face panel.
Make sure you are using the same measurements as noted
previously.
Once you have finished aligning all of your repeating
designs, your face panel should look something like this.
15 16
Sew your two panels, wrong sides facing together, using a
1⁄2” seam allowance. When finished, your backed face panel
should look something like this. We will now start the binding
process. Reference the binding measurements mentioned
earlier to prep your binding strip.
To create a start/stop point for the binding, take the strip right
side down and align its raw edge with the face panel’s raw
edge. Fold the binding strip back to create a triangle, and pin
in place. Sew the binding at a 1⁄2” seam allowance, pivoting
off the first corner at a 45˚ angle, as shown.
17 18
Remove the design from the machine and fold the binding
back against the 45˚ line you stitched. Then, fold the binding
strip back onto itself once more, lining up the raw edge of
the binding with the raw edge of the panel’s seam allowance
(inset). Pin or clip the aligned binding in place.
Follow the same technique seen in pictured steps 16 - 17 to
attach the binding strip along the edges and in each corner.
Continue sewing at a 1⁄2” seam allowance, stopping once you
have stitched outwards on the final corner.
DIY WITH ANITA | ALL ACCESS | 254