CREATING YOUR DANCER
STEP-BY-STEP INSTRUCTIONS
A B
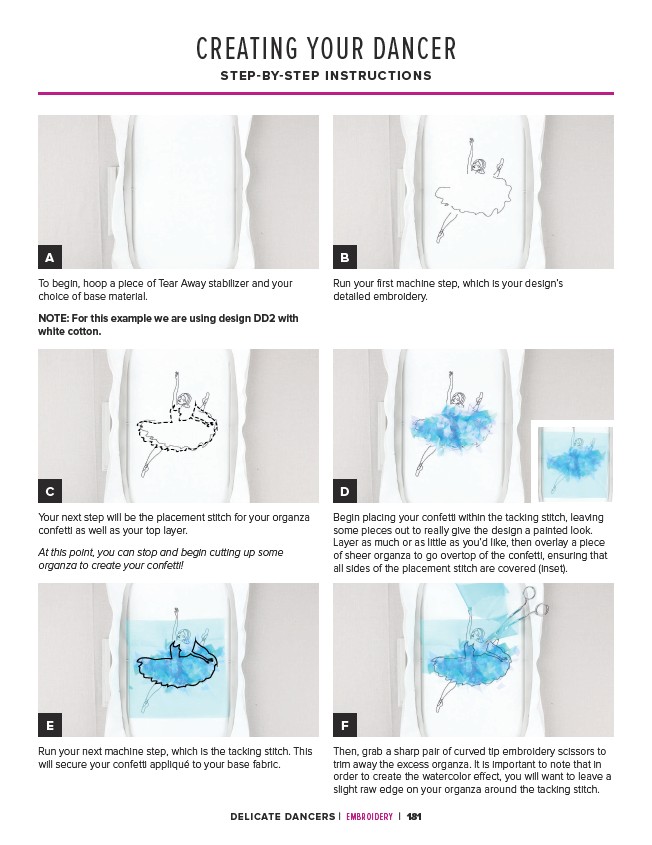
Run your first machine step, which is your design’s
detailed embroidery.
C D
Your next step will be the placement stitch for your organza
confetti as well as your top layer.
At this point, you can stop and begin cutting up some
organza to create your confetti!
Begin placing your confetti within the tacking stitch, leaving
some pieces out to really give the design a painted look.
Layer as much or as little as you’d like, then overlay a piece
of sheer organza to go overtop of the confetti, ensuring that
all sides of the placement stitch are covered (inset).
E F
Run your next machine step, which is the tacking stitch. This
will secure your confetti appliqué to your base fabric.
Then, grab a sharp pair of curved tip embroidery scissors to
trim away the excess organza. It is important to note that in
order to create the watercolor effect, you will want to leave a
slight raw edge on your organza around the tacking stitch.
To begin, hoop a piece of Tear Away stabilizer and your
choice of base material.
NOTE: For this example we are using design DD2 with
white cotton.
DELICATE DANCERS | EMBROIDERY | 181