ASSEMBLING THE REVERSIBLE RUNNER
STEP-BY-STEP INSTRUCTIONS
A B
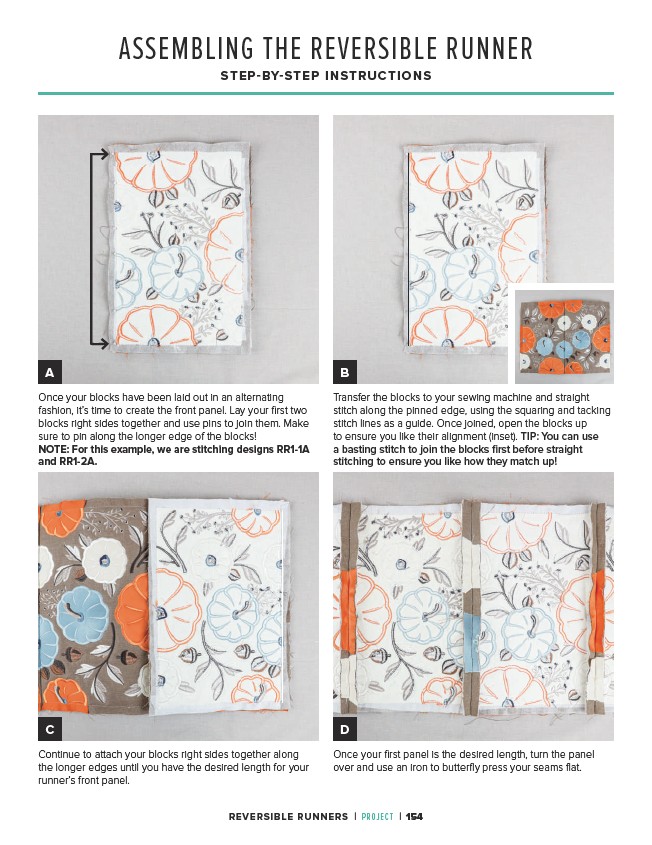
Transfer the blocks to your sewing machine and straight
stitch along the pinned edge, using the squaring and tacking
stitch lines as a guide. Once joined, open the blocks up
to ensure you like their alignment (inset). TIP: You can use
a basting stitch to join the blocks first before straight
stitching to ensure you like how they match up!
C D
Continue to attach your blocks right sides together along
the longer edges until you have the desired length for your
runner’s front panel.
Once your first panel is the desired length, turn the panel
over and use an iron to butterfly press your seams flat.
Once your blocks have been laid out in an alternating
fashion, it’s time to create the front panel. Lay your first two
blocks right sides together and use pins to join them. Make
sure to pin along the longer edge of the blocks!
NOTE: For this example, we are stitching designs RR1-1A
and RR1-2A.
REVERSIBLE RUNNERS | PROJECT | 154