CREATING THE BACK OF THE BAG
STEP-BY-STEP INSTRUCTIONS
A B
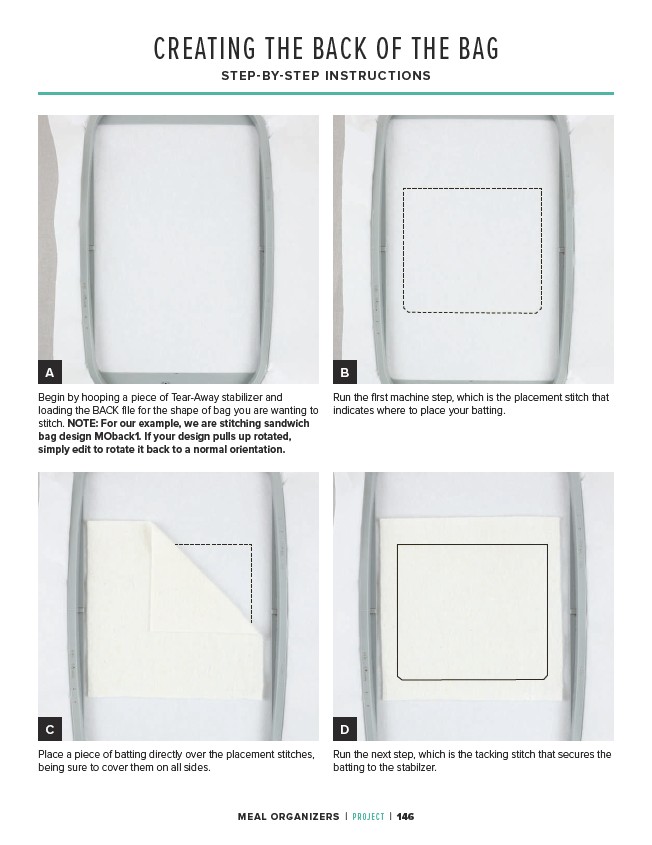
Run the next step, which is the tacking stitch that secures the
batting to the stabilzer.
Begin by hooping a piece of Tear-Away stabilizer and
loading the BACK file for the shape of bag you are wanting to
stitch. NOTE: For our example, we are stitching sandwich
bag design MOback1. If your design pulls up rotated,
simply edit to rotate it back to a normal orientation.
Place a piece of batting directly over the placement stitches,
being sure to cover them on all sides.
Run the first machine step, which is the placement stitch that
indicates where to place your batting.
C D
MEAL ORGANIZERS | PROJECT | 146