STITCHING A FREESTANDING LACE TABLE RUNNER
STEP-BY-STEP INSTRUCTIONS
A B
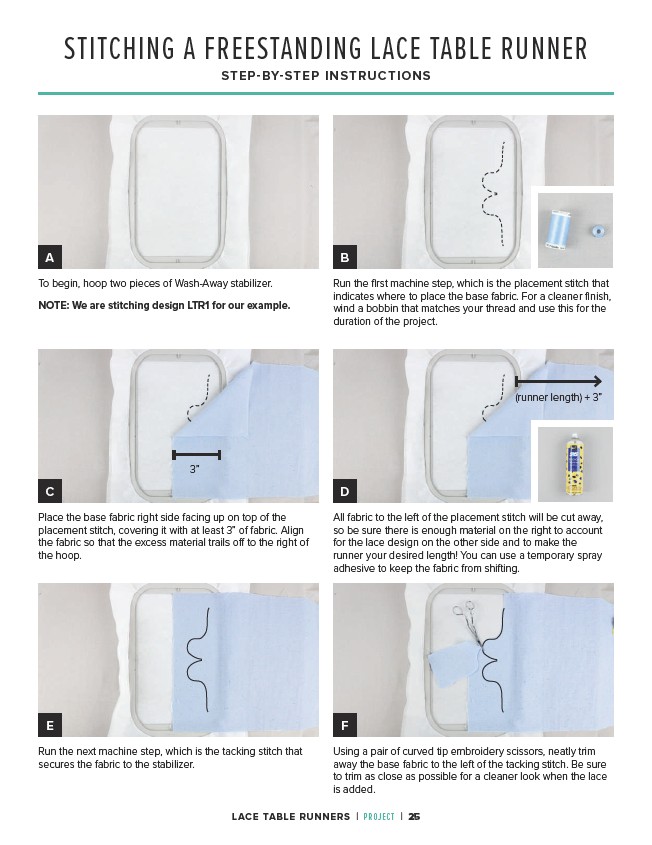
Run the first machine step, which is the placement stitch that
indicates where to place the base fabric. For a cleaner finish,
wind a bobbin that matches your thread and use this for the
duration of the project.
C D
Place the base fabric right side facing up on top of the
placement stitch, covering it with at least 3” of fabric. Align
the fabric so that the excess material trails off to the right of
the hoop.
All fabric to the left of the placement stitch will be cut away,
so be sure there is enough material on the right to account
for the lace design on the other side and to make the
runner your desired length! You can use a temporary spray
adhesive to keep the fabric from shifting.
E F
Run the next machine step, which is the tacking stitch that
secures the fabric to the stabilizer.
Using a pair of curved tip embroidery scissors, neatly trim
away the base fabric to the left of the tacking stitch. Be sure
to trim as close as possible for a cleaner look when the lace
is added.
To begin, hoop two pieces of Wash-Away stabilizer.
NOTE: We are stitching design LTR1 for our example.
3”
(runner length) + 3”
LACE TABLE RUNNERS | PROJECT | 25