T
Your Next Step…
68 www.EliteEquestrianMagazine.com
Continued...
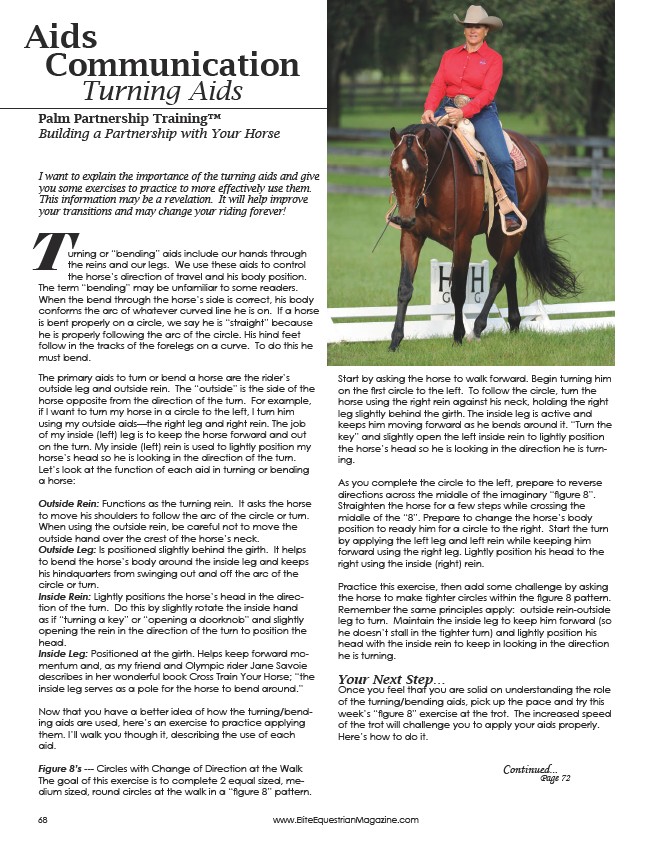
Aids
Communication
Turning Aids
Palm Partnership Training™
Building a Partnership with Your Horse
I want to explain the importance of the turning aids and give
you some exercises to practice to more effectively use them.
This information may be a revelation. It will help improve
your transitions and may change your riding forever!
urning or “bending” aids include our hands through
the reins and our legs. We use these aids to control
the horse’s direction of travel and his body position.
The term “bending” may be unfamiliar to some readers.
When the bend through the horse’s side is correct, his body
conforms the arc of whatever curved line he is on. If a horse
is bent properly on a circle, we say he is “straight” because
he is properly following the arc of the circle. His hind feet
follow in the tracks of the forelegs on a curve. To do this he
must bend.
The primary aids to turn or bend a horse are the rider’s
outside leg and outside rein. The “outside” is the side of the
horse opposite from the direction of the turn. For example,
if I want to turn my horse in a circle to the left, I turn him
using my outside aids—the right leg and right rein. The job
of my inside (left) leg is to keep the horse forward and out
on the turn. My inside (left) rein is used to lightly position my
horse’s head so he is looking in the direction of the turn.
Let’s look at the function of each aid in turning or bending
a horse:
Outside Rein: Functions as the turning rein. It asks the horse
to move his shoulders to follow the arc of the circle or turn.
When using the outside rein, be careful not to move the
outside hand over the crest of the horse’s neck.
Outside Leg: Is positioned slightly behind the girth. It helps
to bend the horse’s body around the inside leg and keeps
his hindquarters from swinging out and off the arc of the
circle or turn.
Inside Rein: Lightly positions the horse’s head in the direction
of the turn. Do this by slightly rotate the inside hand
as if “turning a key” or “opening a doorknob” and slightly
opening the rein in the direction of the turn to position the
head.
Inside Leg: Positioned at the girth. Helps keep forward momentum
and, as my friend and Olympic rider Jane Savoie
describes in her wonderful book Cross Train Your Horse; “the
inside leg serves as a pole for the horse to bend around.”
Now that you have a better idea of how the turning/bending
aids are used, here’s an exercise to practice applying
them. I’ll walk you though it, describing the use of each
aid.
Figure 8’s --- Circles with Change of Direction at the Walk
The goal of this exercise is to complete 2 equal sized, medium
sized, round circles at the walk in a “figure 8” pattern.
Start by asking the horse to walk forward. Begin turning him
on the first circle to the left. To follow the circle, turn the
horse using the right rein against his neck, holding the right
leg slightly behind the girth. The inside leg is active and
keeps him moving forward as he bends around it. “Turn the
key” and slightly open the left inside rein to lightly position
the horse’s head so he is looking in the direction he is turning.
As you complete the circle to the left, prepare to reverse
directions across the middle of the imaginary “figure 8”.
Straighten the horse for a few steps while crossing the
middle of the “8”. Prepare to change the horse’s body
position to ready him for a circle to the right. Start the turn
by applying the left leg and left rein while keeping him
forward using the right leg. Lightly position his head to the
right using the inside (right) rein.
Practice this exercise, then add some challenge by asking
the horse to make tighter circles within the figure 8 pattern.
Remember the same principles apply: outside rein-outside
leg to turn. Maintain the inside leg to keep him forward (so
he doesn’t stall in the tighter turn) and lightly position his
head with the inside rein to keep in looking in the direction
he is turning.
Once you feel that you are solid on understanding the role
of the turning/bending aids, pick up the pace and try this
week’s “figure 8” exercise at the trot. The increased speed
of the trot will challenge you to apply your aids properly.
Here’s how to do it.
Page 72
/www.EliteEquestrianMagazine.com