Notes
SOL A R I S D E M O G U I D E | 2 7 |
SOLARIS DEMO GUIDE - SEWING STEP BY STEP
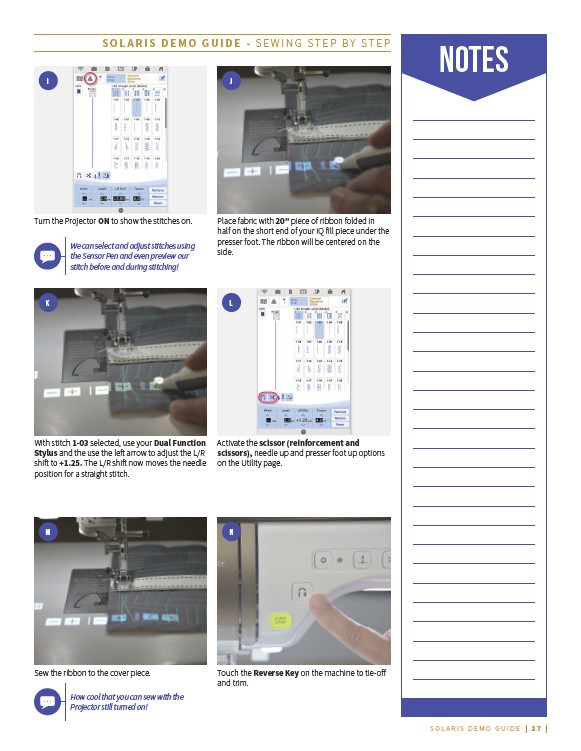
I J
Turn the Projector ON to show the stitches on. Place fabric with 20” piece of ribbon folded in
half on the short end of your IQ fill piece under the
presser foot. The ribbon will be centered on the
side.
K
With stitch 1-03 selected, use your Dual Function
Stylus and the use the left arrow to adjust the L/R
shift to +1.25. The L/R shift now moves the needle
position for a straight stitch.
L
Activate the scissor (reinforcement and
scissors), needle up and presser foot up options
on the Utility page.
M N
Sew the ribbon to the cover piece. Touch the Reverse Key on the machine to tie-off
and trim.
We can select and adjust stitches using
the Sensor Pen and even preview our
stitch before and during stitching!
How cool that you can sew with the
Projector still turned on!