Step-by-Step
Instructions
A B
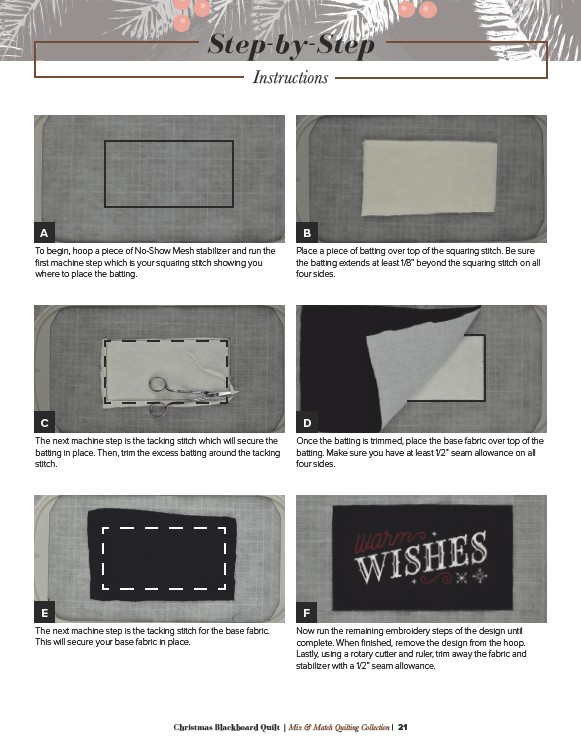
To begin, hoop a piece of No-Show Mesh stabilizer and run the
first machine step which is your squaring stitch showing you
where to place the batting.
Place a piece of batting over top of the squaring stitch. Be sure
the batting extends at least 1/8” beyond the squaring stitch on all
four sides.
C D
The next machine step is the tacking stitch which will secure the
batting in place. Then, trim the excess batting around the tacking
stitch.
Once the batting is trimmed, place the base fabric over top of the
batting. Make sure you have at least 1/2” seam allowance on all
four sides.
E F
The next machine step is the tacking stitch for the base fabric.
This will secure your base fabric in place.
Now run the remaining embroidery steps of the design until
complete. When finished, remove the design from the hoop.
Lastly, using a rotary cutter and ruler, trim away the fabric and
stabilizer with a 1/2” seam allowance.
Christmas Blackboard Quilt | Mix & Match Quilting Collection | 21