11 12
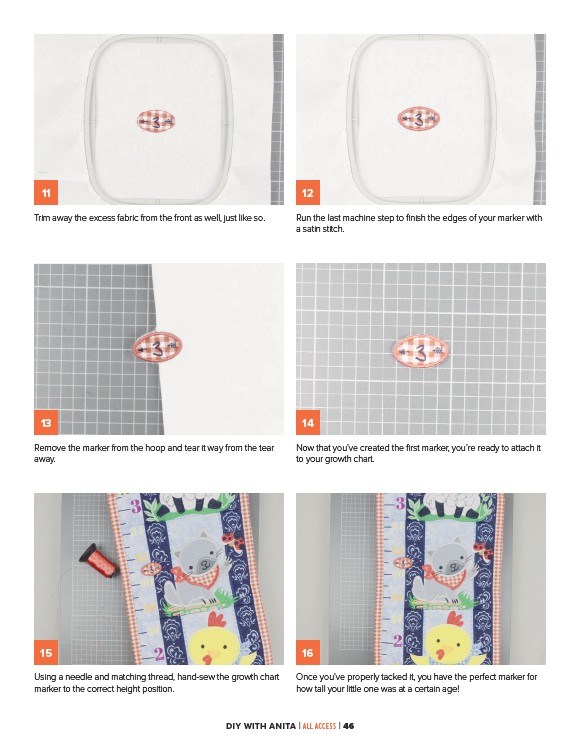
Trim away the excess fabric from the front as well, just like so.
Run the last machine step to finish the edges of your marker with
a satin stitch.
13 14
Remove the marker from the hoop and tear it way from the tear
away.
Now that you’ve created the first marker, you’re ready to attach it
to your growth chart.
15 16
Using a needle and matching thread, hand-sew the growth chart
marker to the correct height position.
Once you’ve properly tacked it, you have the perfect marker for
how tall your little one was at a certain age!
DIY WITH ANITA | ALL ACCESS | 46