DIY PROJECTS
1 2
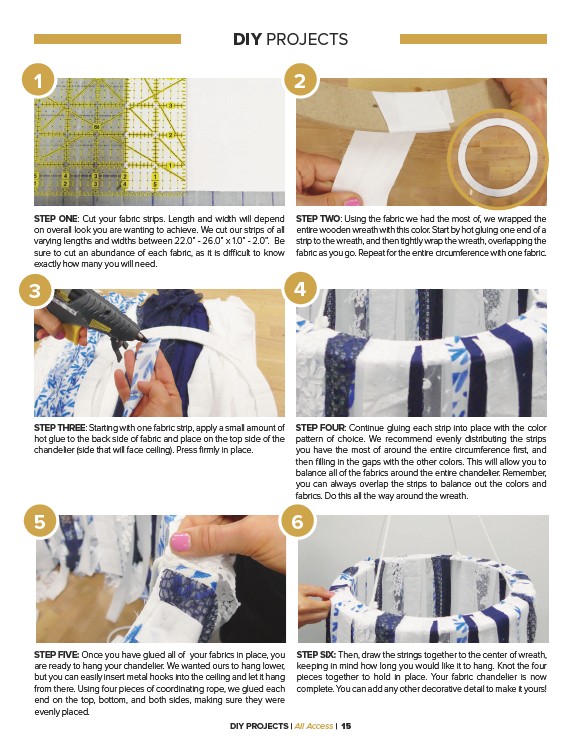
STEP TWO: Using the fabric we had the most of, we wrapped the
entire wooden wreath with this color. Start by hot gluing one end of a
strip to the wreath, and then tightly wrap the wreath, overlapping the
fabric as you go. Repeat for the entire circumference with one fabric.
4
STEP ONE: Cut your fabric strips. Length and width will depend
on overall look you are wanting to achieve. We cut our strips of all
varying lengths and widths between 22.0” - 26.0” x 1.0” - 2.0”. Be
sure to cut an abundance of each fabric, as it is difficult to know
exactly how many you will need.
3
STEP THREE: Starting with one fabric strip, apply a small amount of
hot glue to the back side of fabric and place on the top side of the
chandelier (side that will face ceiling). Press firmly in place.
5 6
STEP FIVE: Once you have glued all of your fabrics in place, you
are ready to hang your chandelier. We wanted ours to hang lower,
but you can easily insert metal hooks into the ceiling and let it hang
from there. Using four pieces of coordinating rope, we glued each
end on the top, bottom, and both sides, making sure they were
evenly placed.
STEP FOUR: Continue gluing each strip into place with the color
pattern of choice. We recommend evenly distributing the strips
you have the most of around the entire circumference first, and
then filling in the gaps with the other colors. This will allow you to
balance all of the fabrics around the entire chandelier. Remember,
you can always overlap the strips to balance out the colors and
fabrics. Do this all the way around the wreath.
STEP SIX: Then, draw the strings together to the center of wreath,
keeping in mind how long you would like it to hang. Knot the four
pieces together to hold in place. Your fabric chandelier is now
complete. You can add any other decorative detail to make it yours!
DIY PROJECTS | All Access | 15