#TybeeRocks By Wen McNally
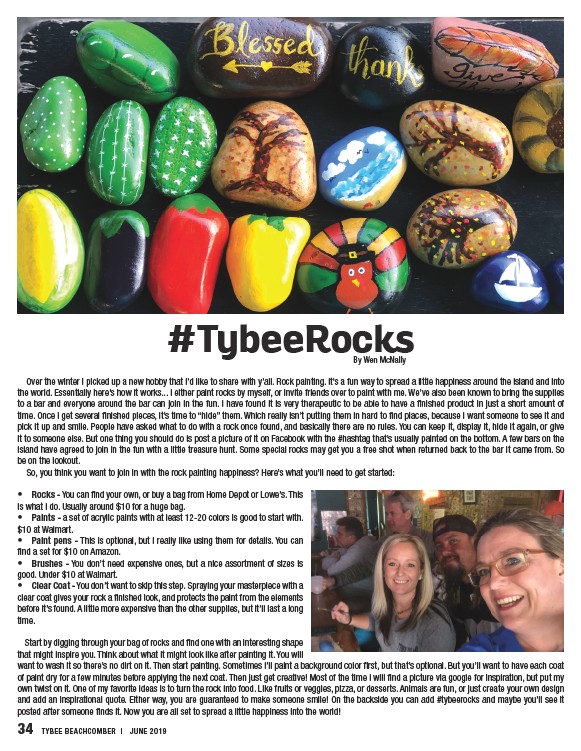
Over the winter I picked up a new hobby that I’d like to share with y’all. Rock painting. It’s a fun way to spread a little happiness around the island and into
the world. Essentially here’s how it works... I either paint rocks by myself, or invite friends over to paint with me. We’ve also been known to bring the supplies
to a bar and everyone around the bar can join in the fun. I have found it is very therapeutic to be able to have a finished product in just a short amount of
time. Once I get several finished pieces, it’s time to “hide” them. Which really isn’t putting them in hard to find places, because I want someone to see it and
pick it up and smile. People have asked what to do with a rock once found, and basically there are no rules. You can keep it, display it, hide it again, or give
it to someone else. But one thing you should do is post a picture of it on Facebook with the #hashtag that’s usually painted on the bottom. A few bars on the
island have agreed to join in the fun with a little treasure hunt. Some special rocks may get you a free shot when returned back to the bar it came from. So
be on the lookout.
So, you think you want to join in with the rock painting happiness? Here’s what you’ll need to get started:
• Rocks - You can find your own, or buy a bag from Home Depot or Lowe’s. This
is what I do. Usually around $10 for a huge bag.
• Paints - a set of acrylic paints with at least 12-20 colors is good to start with.
$10 at Walmart.
• Paint pens - This is optional, but I really like using them for details. You can
find a set for $10 on Amazon.
• Brushes - You don’t need expensive ones, but a nice assortment of sizes is
good. Under $10 at Walmart.
• Clear Coat - You don’t want to skip this step. Spraying your masterpiece with a
clear coat gives your rock a finished look, and protects the paint from the elements
before it’s found. A little more expensive than the other supplies, but it’ll last a long
time.
Start by digging through your bag of rocks and find one with an interesting shape
that might inspire you. Think about what it might look like after painting it. You will
want to wash it so there’s no dirt on it. Then start painting. Sometimes I’ll paint a background color first, but that’s optional. But you’ll want to have each coat
of paint dry for a few minutes before applying the next coat. Then just get creative! Most of the time I will find a picture via google for inspiration, but put my
own twist on it. One of my favorite ideas is to turn the rock into food. Like fruits or veggies, pizza, or desserts. Animals are fun, or just create your own design
and add an inspirational quote. Either way, you are guaranteed to make someone smile! On the backside you can add #tybeerocks and maybe you’ll see it
posted after someone finds it. Now you are all set to spread a little happiness into the world!
34 TYBEE BEACHCOMBER | JUNE 2019