G H
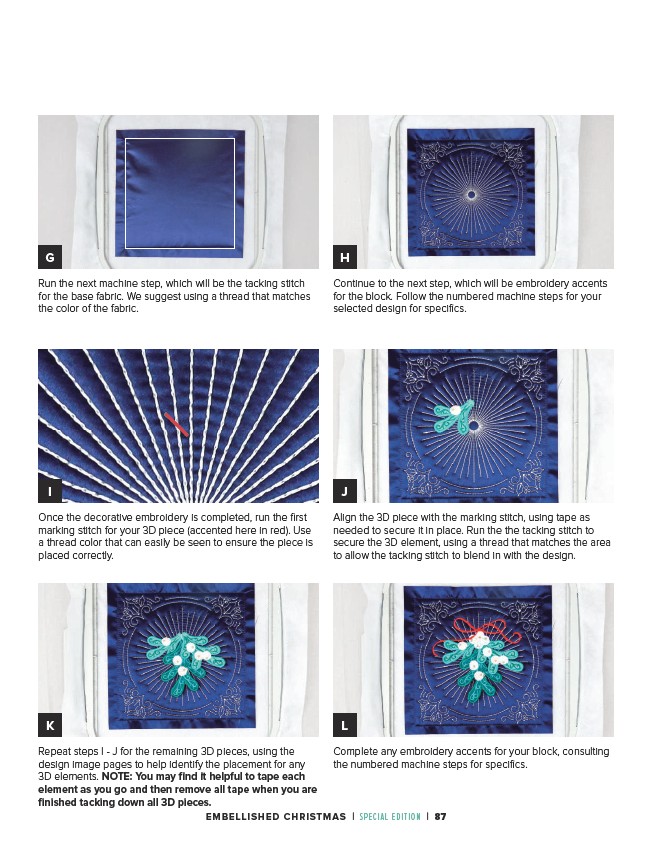
Continue to the next step, which will be embroidery accents
for the block. Follow the numbered machine steps for your
selected design for specifics.
I J
Once the decorative embroidery is completed, run the first
marking stitch for your 3D piece (accented here in red). Use
a thread color that can easily be seen to ensure the piece is
placed correctly.
Align the 3D piece with the marking stitch, using tape as
needed to secure it in place. Run the the tacking stitch to
secure the 3D element, using a thread that matches the area
to allow the tacking stitch to blend in with the design.
K L
Repeat steps I - J for the remaining 3D pieces, using the
design image pages to help identify the placement for any
3D elements. NOTE: You may find it helpful to tape each
element as you go and then remove all tape when you are
finished tacking down all 3D pieces.
Complete any embroidery accents for your block, consulting
the numbered machine steps for specifics.
Run the next machine step, which will be the tacking stitch
for the base fabric. We suggest using a thread that matches
the color of the fabric.
EMBELLISHED CHRISTMAS | SPECIAL EDITION | 87