G H
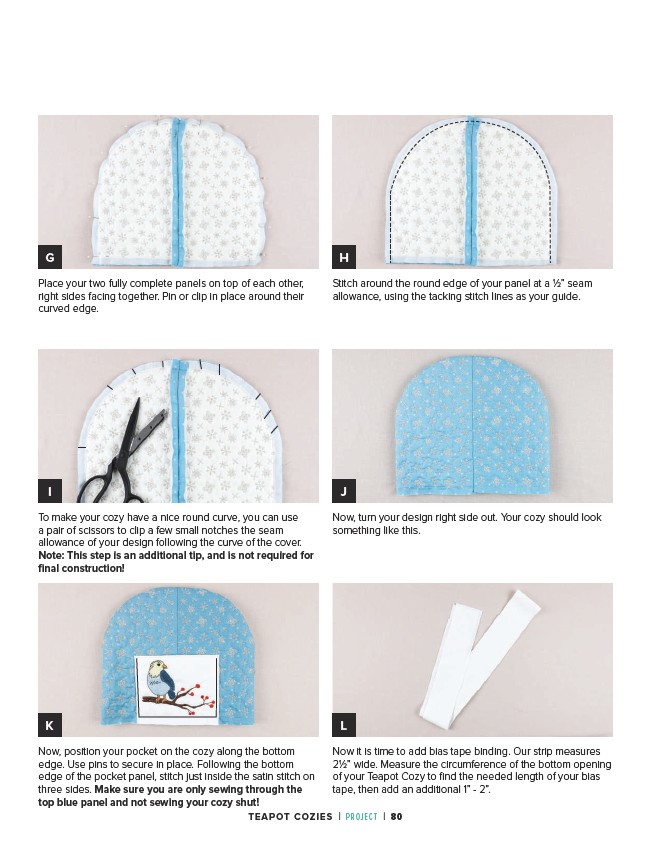
Stitch around the round edge of your panel at a 1⁄2” seam
allowance, using the tacking stitch lines as your guide.
I J
To make your cozy have a nice round curve, you can use
a pair of scissors to clip a few small notches the seam
allowance of your design following the curve of the cover.
Note: This step is an additional tip, and is not required for
final construction!
Now, turn your design right side out. Your cozy should look
something like this.
K L
Now, position your pocket on the cozy along the bottom
edge. Use pins to secure in place. Following the bottom
edge of the pocket panel, stitch just inside the satin stitch on
three sides. Make sure you are only sewing through the
top blue panel and not sewing your cozy shut!
Now it is time to add bias tape binding. Our strip measures
21⁄2” wide. Measure the circumference of the bottom opening
of your Teapot Cozy to find the needed length of your bias
tape, then add an additional 1” - 2”.
Place your two fully complete panels on top of each other,
right sides facing together. Pin or clip in place around their
curved edge.
TEAPOT COZIES | PROJECT | 80