G H
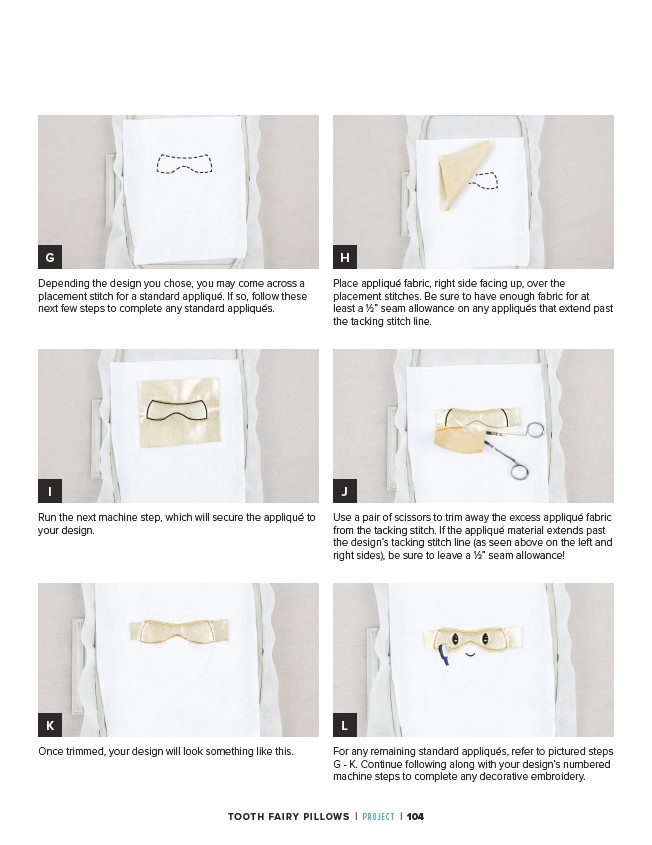
Place appliqué fabric, right side facing up, over the
placement stitches. Be sure to have enough fabric for at
least a 1⁄2” seam allowance on any appliqués that extend past
the tacking stitch line.
I J
Run the next machine step, which will secure the appliqué to
your design.
Use a pair of scissors to trim away the excess appliqué fabric
from the tacking stitch. If the appliqué material extends past
the design’s tacking stitch line (as seen above on the left and
right sides), be sure to leave a 1⁄2” seam allowance!
K L
Once trimmed, your design will look something like this. For any remaining standard appliqués, refer to pictured steps
G - K. Continue following along with your design’s numbered
machine steps to complete any decorative embroidery.
Depending the design you chose, you may come across a
placement stitch for a standard appliqué. If so, follow these
next few steps to complete any standard appliqués.
TOOTH FAIRY PILLOWS | PROJECT | 104