These Kitchen Bag dispensers are constructed using four
blocks. First, you will choose one of the main designs for
your bag from designs KBD1-13, and stitch out two copies.
Then, you will need two of the stippled block file, KBD-SB. If
you are creating your dispenser with more than two blocks
on each side, keep in mind you will need to stitch two of the
each block to create the front and back of the dispenser.
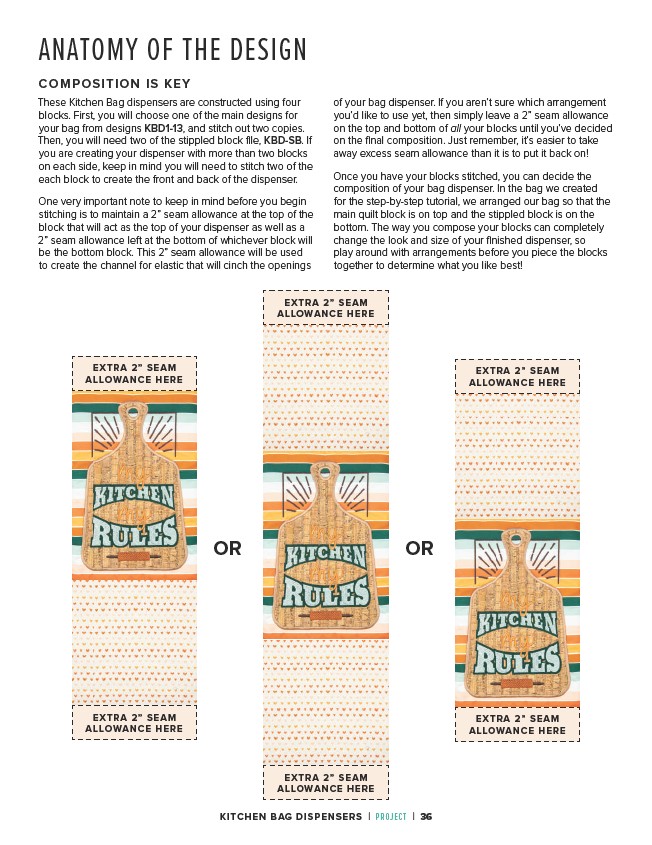
One very important note to keep in mind before you begin
stitching is to maintain a 2” seam allowance at the top of the
block that will act as the top of your dispenser as well as a
2” seam allowance left at the bottom of whichever block will
be the bottom block. This 2” seam allowance will be used
to create the channel for elastic that will cinch the openings
of your bag dispenser. If you aren’t sure which arrangement
you’d like to use yet, then simply leave a 2” seam allowance
on the top and bottom of all your blocks until you’ve decided
on the final composition. Just remember, it’s easier to take
away excess seam allowance than it is to put it back on!
Once you have your blocks stitched, you can decide the
composition of your bag dispenser. In the bag we created
for the step-by-step tutorial, we arranged our bag so that the
main quilt block is on top and the stippled block is on the
bottom. The way you compose your blocks can completely
change the look and size of your finished dispenser, so
play around with arrangements before you piece the blocks
together to determine what you like best!
ANATOMY OF THE DESIGN
COMPOSITION IS KEY
OR OR
EXTRA 2” SEAM
ALLOWANCE HERE
EXTRA 2” SEAM
ALLOWANCE HERE
EXTRA 2” SEAM
ALLOWANCE HERE
EXTRA 2” SEAM
ALLOWANCE HERE
EXTRA 2” SEAM
ALLOWANCE HERE
EXTRA 2” SEAM
ALLOWANCE HERE
KITCHEN BAG DISPENSERS | PROJECT | 36