D I Y A N I TA
STEP-BY-STEP
INSTRUCTIONS
1 2
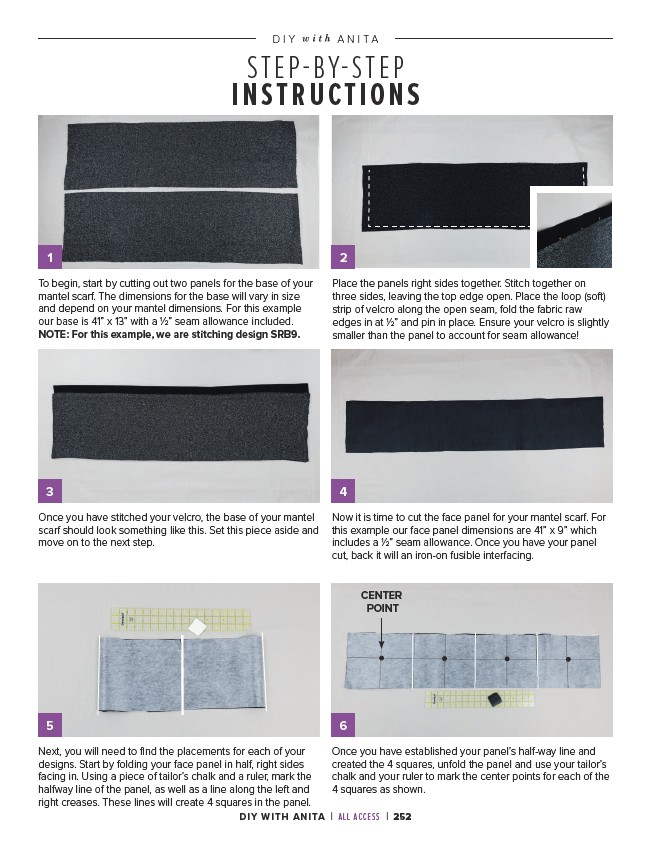
Place the panels right sides together. Stitch together on
three sides, leaving the top edge open. Place the loop (soft)
strip of velcro along the open seam, fold the fabric raw
edges in at 1⁄2” and pin in place. Ensure your velcro is slightly
smaller than the panel to account for seam allowance!
To begin, start by cutting out two panels for the base of your
mantel scarf. The dimensions for the base will vary in size
and depend on your mantel dimensions. For this example
our base is 41” x 13” with a 1⁄2” seam allowance included.
NOTE: For this example, we are stitching design SRB9.
3 4
Once you have stitched your velcro, the base of your mantel
scarf should look something like this. Set this piece aside and
move on to the next step.
Now it is time to cut the face panel for your mantel scarf. For
this example our face panel dimensions are 41” x 9” which
includes a 1⁄2” seam allowance. Once you have your panel
cut, back it will an iron-on fusible interfacing.
5 6
Next, you will need to find the placements for each of your
designs. Start by folding your face panel in half, right sides
facing in. Using a piece of tailor’s chalk and a ruler, mark the
halfway line of the panel, as well as a line along the left and
right creases. These lines will create 4 squares in the panel.
CENTER
POINT
Once you have established your panel’s half-way line and
created the 4 squares, unfold the panel and use your tailor’s
chalk and your ruler to mark the center points for each of the
4 squares as shown.
DIY WITH ANITA | ALL ACCESS | 252