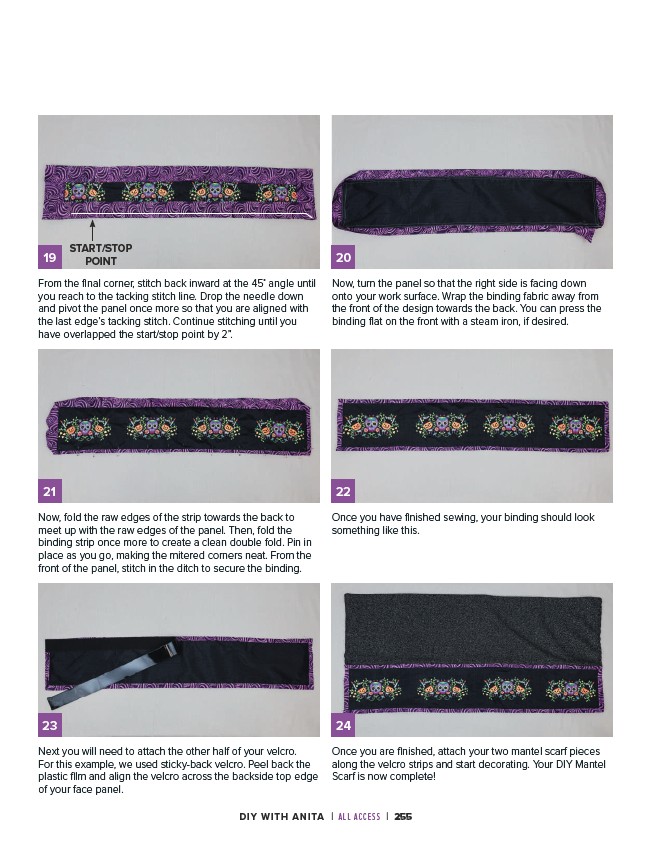
19 20
Now, turn the panel so that the right side is facing down
onto your work surface. Wrap the binding fabric away from
the front of the design towards the back. You can press the
binding flat on the front with a steam iron, if desired.
From the final corner, stitch back inward at the 45˚ angle until
you reach to the tacking stitch line. Drop the needle down
and pivot the panel once more so that you are aligned with
the last edge’s tacking stitch. Continue stitching until you
have overlapped the start/stop point by 2”.
21 22
Now, fold the raw edges of the strip towards the back to
meet up with the raw edges of the panel. Then, fold the
binding strip once more to create a clean double fold. Pin in
place as you go, making the mitered corners neat. From the
front of the panel, stitch in the ditch to secure the binding.
Once you have finished sewing, your binding should look
something like this.
23 24
Next you will need to attach the other half of your velcro.
For this example, we used sticky-back velcro. Peel back the
plastic film and align the velcro across the backside top edge
of your face panel.
Once you are finished, attach your two mantel scarf pieces
along the velcro strips and start decorating. Your DIY Mantel
Scarf is now complete!
DIY WITH ANITA | ALL ACCESS | 255
START/STOP
POINT