I J
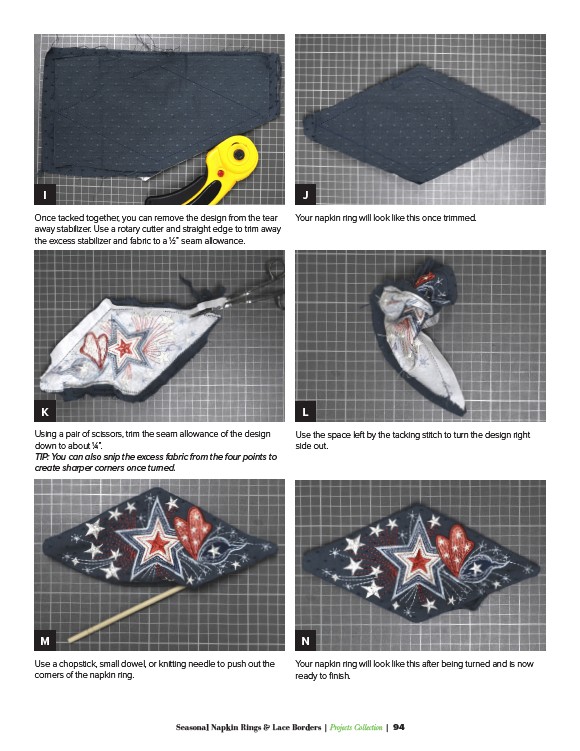
Once tacked together, you can remove the design from the tear
away stabilizer. Use a rotary cutter and straight edge to trim away
the excess stabilizer and fabric to a 1/2” seam allowance.
Your napkin ring will look like this once trimmed.
K L
Using a pair of scissors, trim the seam allowance of the design
down to about 1/4”.
TIP: You can also snip the excess fabric from the four points to
create sharper corners once turned.
Use the space left by the tacking stitch to turn the design right
side out.
M N
Use a chopstick, small dowel, or knitting needle to push out the
corners of the napkin ring.
Your napkin ring will look like this after being turned and is now
ready to finish.
Seasonal Napkin Rings & Lace Borders | Projects Collection | 94