OE PF
Next, we will add the button hole to the napkin ring design to
make it functional. To do this, hoop two pieces of Wash Away
stabilizer and load the SN NapkinRing.
The first step will be a placement stitch for your napkin ring.
QE RF
Next, place the napkin ring within the placement stitch right side
facing up. TIP: You can use a piece of rolled tape to stick the
design into the placement stitch before it gets secured to the
hoop.
Run the second step of the design file, which will be a basting
stitch to temporarily tack the napkin ring to the stabilizer.
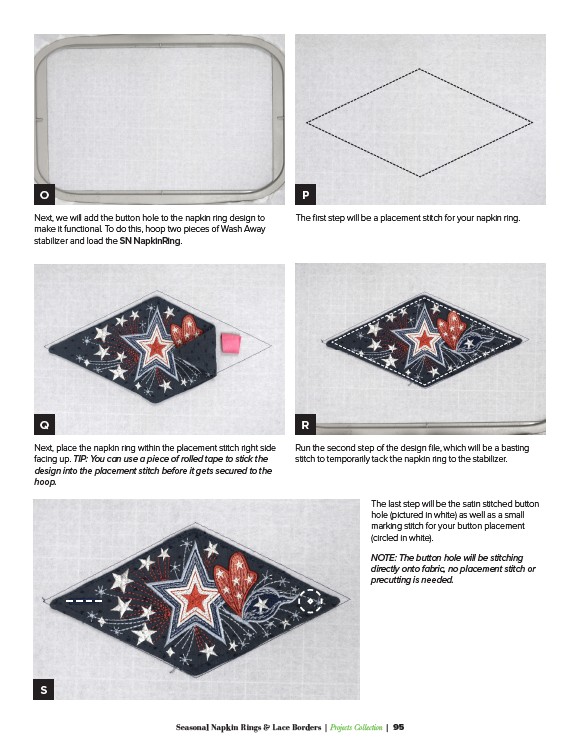
The last step will be the satin stitched button
hole (pictured in white) as well as a small
marking stitch for your button placement
(circled in white).
NOTE: The button hole will be stitching
directly onto fabric, no placement stitch or
precutting is needed.
Seasonal Napkin Rings & Lace Borders | Projects Collection | 95
E
S