FINISHING THE APRON
STEP-BY-STEP INSTRUCTIONS
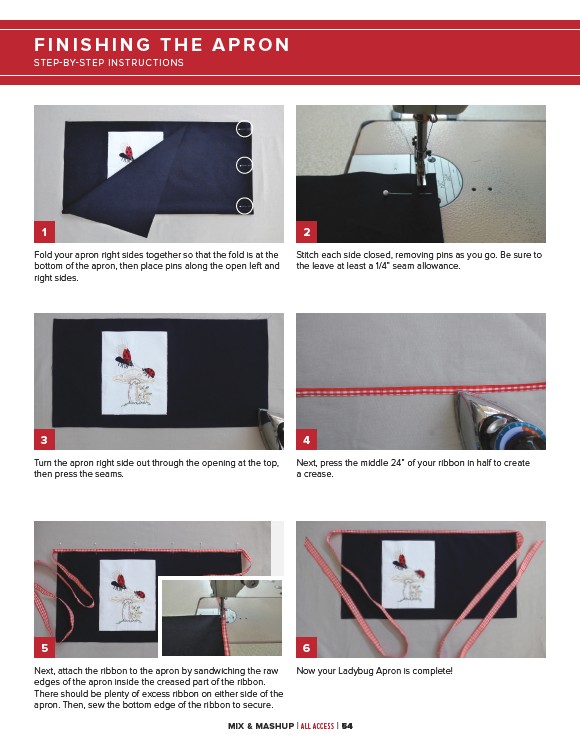
1 2
Stitch each side closed, removing pins as you go. Be sure to
the leave at least a 1/4” seam allowance.
Fold your apron right sides together so that the fold is at the
bottom of the apron, then place pins along the open left and
right sides.
3 4
Turn the apron right side out through the opening at the top,
then press the seams.
Next, press the middle 24” of your ribbon in half to create
a crease.
5 6
Next, attach the ribbon to the apron by sandwiching the raw
edges of the apron inside the creased part of the ribbon.
There should be plenty of excess ribbon on either side of the
apron. Then, sew the bottom edge of the ribbon to secure.
Now your Ladybug Apron is complete!
MIX & MASHUP | ALL ACCESS | 54