STITCHING A FREE STANDING DESIGN
STEP-BY-STEP INSTRUCTIONS
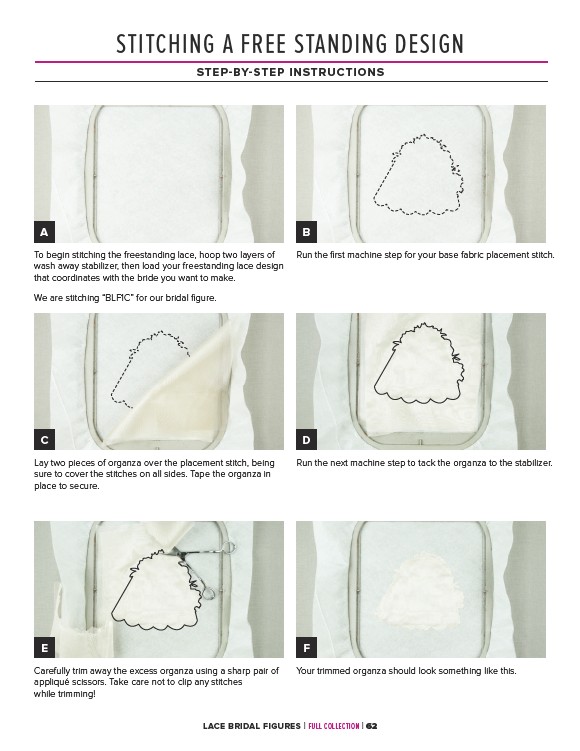
A B
Run the first machine step for your base fabric placement stitch.
To begin stitching the freestanding lace, hoop two layers of
wash away stabilizer, then load your freestanding lace design
that coordinates with the bride you want to make.
We are stitching “BLF1C” for our bridal figure.
C D
Lay two pieces of organza over the placement stitch, being
sure to cover the stitches on all sides. Tape the organza in
place to secure.
Run the next machine step to tack the organza to the stabilizer.
E F
Carefully trim away the excess organza using a sharp pair of
appliqué scissors. Take care not to clip any stitches
while trimming!
Your trimmed organza should look something like this.
LACE BRIDAL FIGURES | FULL COLLECTION | 62