Making a Garland
��������������������������������������������������
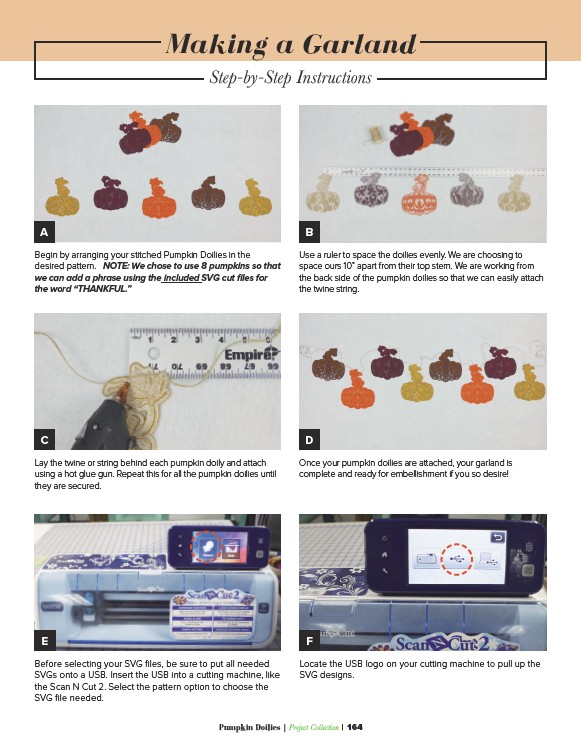
A B
Begin by arranging your stitched Pumpkin Doilies in the
desired pattern. NOTE: We chose to use 8 pumpkins so that
we can add a phrase using the included SVG cut files for
the word “THANKFUL.”
Use a ruler to space the doilies evenly. We are choosing to
space ours 10” apart from their top stem. We are working from
the back side of the pumpkin doilies so that we can easily attach
the twine string.
C D
Lay the twine or string behind each pumpkin doily and attach
using a hot glue gun. Repeat this for all the pumpkin doilies until
they are secured.
Once your pumpkin doilies are attached, your garland is
complete and ready for embellishment if you so desire!
E F
Before selecting your SVG files, be sure to put all needed
SVGs onto a USB. Insert the USB into a cutting machine, like
the Scan N Cut 2. Select the pattern option to choose the
SVG file needed.
Locate the USB logo on your cutting machine to pull up the
SVG designs.
Pumpkin Doilies | ������������������������������������ | 164