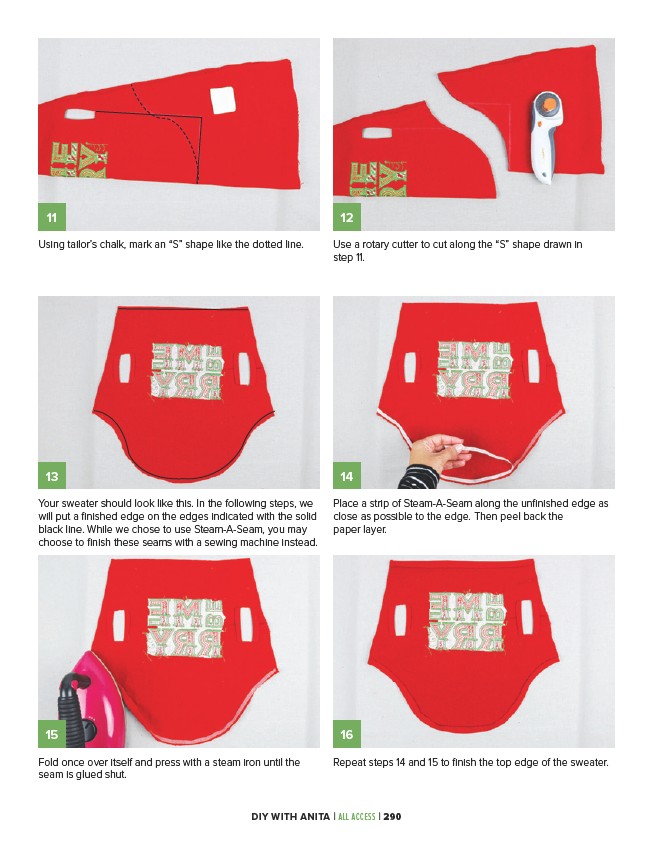
11 12
Using tailor’s chalk, mark an “S” shape like the dotted line.
Use a rotary cutter to cut along the “S” shape drawn in
step 11.
13 14
Your sweater should look like this. In the following steps, we
will put a finished edge on the edges indicated with the solid
black line. While we chose to use Steam-A-Seam, you may
choose to finish these seams with a sewing machine instead.
Place a strip of Steam-A-Seam along the unfinished edge as
close as possible to the edge. Then peel back the
paper layer.
15 16
Fold once over itself and press with a steam iron until the
seam is glued shut.
Repeat steps 14 and 15 to finish the top edge of the sweater.
DIY WITH ANITA | ALL ACCESS | 290