Y Z
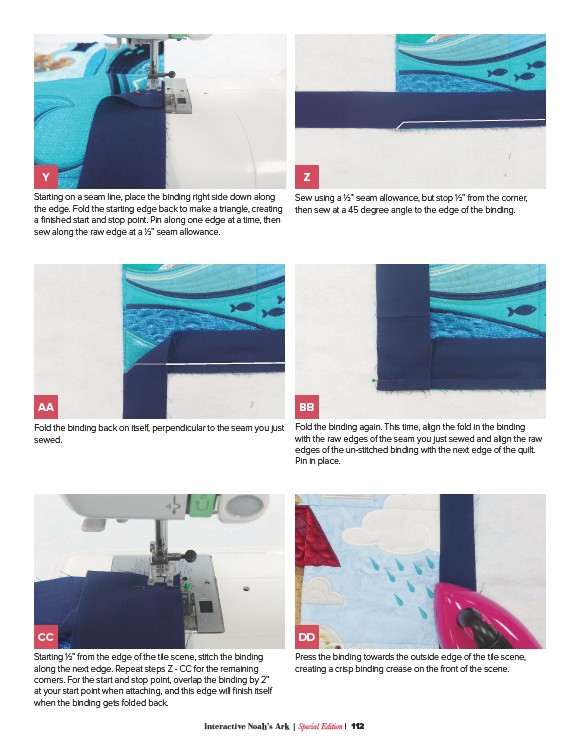
Starting on a seam line, place the binding right side down along
the edge. Fold the starting edge back to make a triangle, creating
a finished start and stop point. Pin along one edge at a time, then
sew along the raw edge at a 1⁄2” seam allowance.
Sew using a ½” seam allowance, but stop ½” from the corner,
then sew at a 45 degree angle to the edge of the binding.
AA BB
Fold the binding back on itself, perpendicular to the seam you just
sewed.
Fold the binding again. This time, align the fold in the binding
with the raw edges of the seam you just sewed and align the raw
edges of the un-stitched binding with the next edge of the quilt.
Pin in place.
CC DD
Starting ½” from the edge of the tile scene, stitch the binding
along the next edge. Repeat steps Z - CC for the remaining
corners. For the start and stop point, overlap the binding by 2”
at your start point when attaching, and this edge will finish itself
when the binding gets folded back.
Press the binding towards the outside edge of the tile scene,
creating a crisp binding crease on the front of the scene.
Interactive Noah’s Ark | Special Edition | 112