CORNER QUILT LABEL
STEP-BY-STEP INSTRUCTIONS
A B
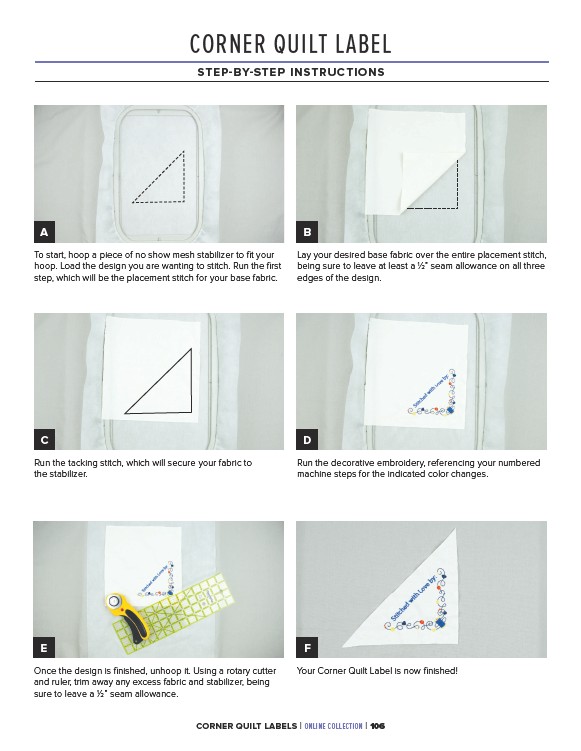
To start, hoop a piece of no show mesh stabilizer to fit your
hoop. Load the design you are wanting to stitch. Run the first
step, which will be the placement stitch for your base fabric.
Lay your desired base fabric over the entire placement stitch,
being sure to leave at least a 1⁄2” seam allowance on all three
edges of the design.
C D
Run the tacking stitch, which will secure your fabric to
the stabilizer.
Run the decorative embroidery, referencing your numbered
machine steps for the indicated color changes.
E F
Once the design is finished, unhoop it. Using a rotary cutter
and ruler, trim away any excess fabric and stabilizer, being
sure to leave a 1⁄2” seam allowance.
Your Corner Quilt Label is now finished!
CORNER QUILT LABELS | ONLINE COLLECTION | 106