CREATING YOUR FLOWER ARRANGEMENT
STEP-BY-STEP INSTRUCTIONS
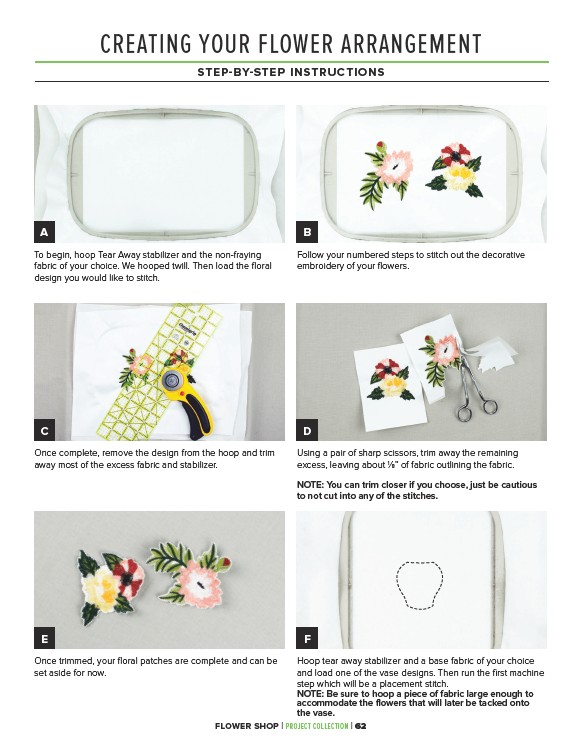
A B
Follow your numbered steps to stitch out the decorative
embroidery of your flowers.
To begin, hoop Tear Away stabilizer and the non-fraying
fabric of your choice. We hooped twill. Then load the floral
design you would like to stitch.
C D
Once complete, remove the design from the hoop and trim
away most of the excess fabric and stabilizer.
Using a pair of sharp scissors, trim away the remaining
excess, leaving about 1⁄8” of fabric outlining the fabric.
NOTE: You can trim closer if you choose, just be cautious
to not cut into any of the stitches.
E F
Once trimmed, your floral patches are complete and can be
set aside for now.
Hoop tear away stabilizer and a base fabric of your choice
and load one of the vase designs. Then run the first machine
step which will be a placement stitch.
NOTE: Be sure to hoop a piece of fabric large enough to
accommodate the flowers that will later be tacked onto
the vase.
FLOWER SHOP | PROJECT COLLECTION | 62