7 8
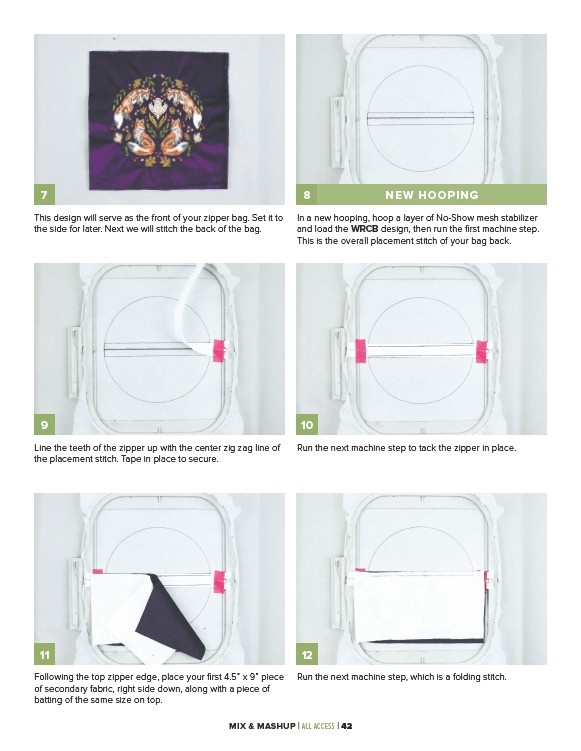
This design will serve as the front of your zipper bag. Set it to
the side for later. Next we will stitch the back of the bag.
9 10
Line the teeth of the zipper up with the center zig zag line of
the placement stitch. Tape in place to secure.
11 12
Following the top zipper edge, place your first 4.5” x 9” piece
of secondary fabric, right side down, along with a piece of
batting of the same size on top.
In a new hooping, hoop a layer of No-Show mesh stabilizer
and load the WRCB design, then run the first machine step.
This is the overall placement stitch of your bag back.
Run the next machine step to tack the zipper in place.
Run the next machine step, which is a folding stitch.
MIX & MASHUP | ALL ACCESS | 42
NEW HOOPING