FRONT OF BAG STEP-BY-STEP INSTRUCTIONS
STEP J
Follow the numbered machine steps to stitch out any
remaining decorative embroidery. Stop just after the
marking stitches that will indicate where to place the
appendages that you stitched out earlier.
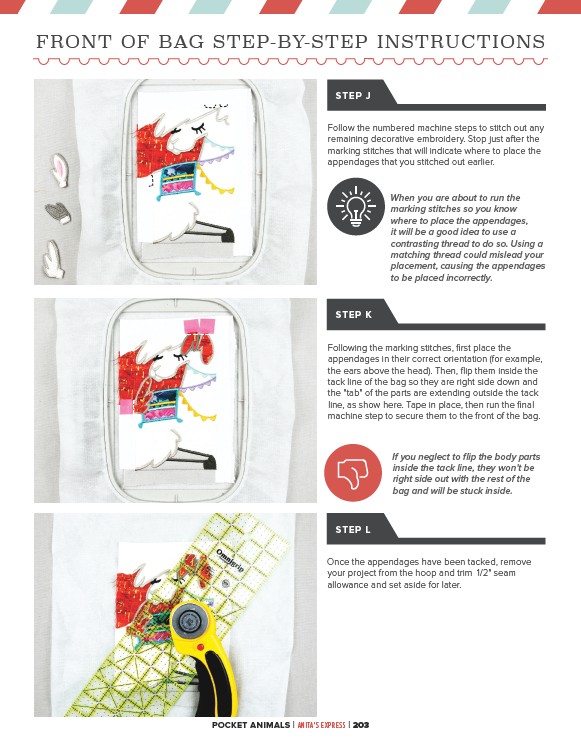
Following the marking stitches, first place the
appendages in their correct orientation (for example,
the ears above the head). Then, flip them inside the
tack line of the bag so they are right side down and
the "tab" of the parts are extending outside the tack
line, as show here. Tape in place, then run the final
machine step to secure them to the front of the bag.
Once the appendages have been tacked, remove
your project from the hoop and trim 1/2" seam
allowance and set aside for later.
POCKET ANIMALS | ANITA'S EXPRESS | 203
If you neglect to flip the body parts
inside the tack line, they won't be
right side out with the rest of the
bag and will be stuck inside.
STEP K
STEP L
When you are about to run the
marking stitches so you know
where to place the appendages,
it will be a good idea to use a
contrasting thread to do so. Using a
matching thread could mislead your
placement, causing the appendages
to be placed incorrectly.