Stitching Your Velcro Blocks
STEP-BY-STEP INSTRUCTIONS
G H
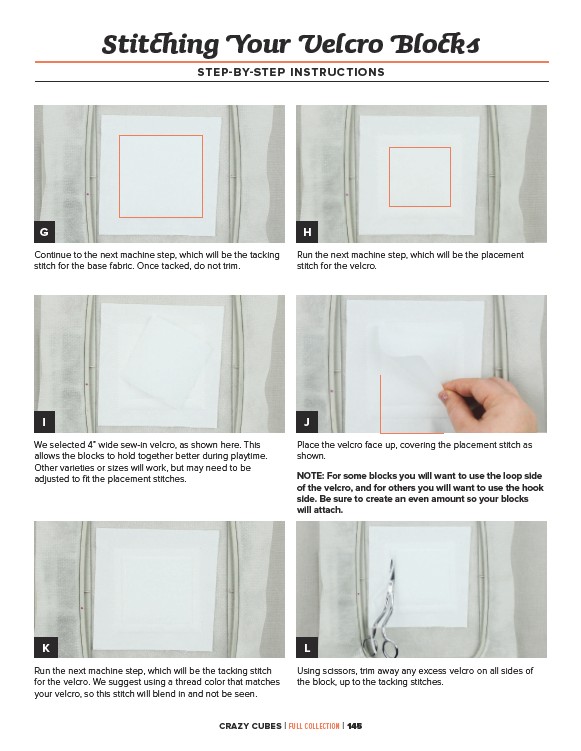
Continue to the next machine step, which will be the tacking
stitch for the base fabric. Once tacked, do not trim.
Run the next machine step, which will be the placement
stitch for the velcro.
I J
We selected 4” wide sew-in velcro, as shown here. This
allows the blocks to hold together better during playtime.
Other varieties or sizes will work, but may need to be
adjusted to fit the placement stitches.
Place the velcro face up, covering the placement stitch as
shown.
NOTE: For some blocks you will want to use the loop side
of the velcro, and for others you will want to use the hook
side. Be sure to create an even amount so your blocks
will attach.
K L
Run the next machine step, which will be the tacking stitch
for the velcro. We suggest using a thread color that matches
your velcro, so this stitch will blend in and not be seen.
Using scissors, trim away any excess velcro on all sides of
the block, up to the tacking stitches.
CRAZY CUBES | FULL COLLECTION | 145