STITCHING YOUR MARKER
STEP-BY-STEP INSTRUCTIONS
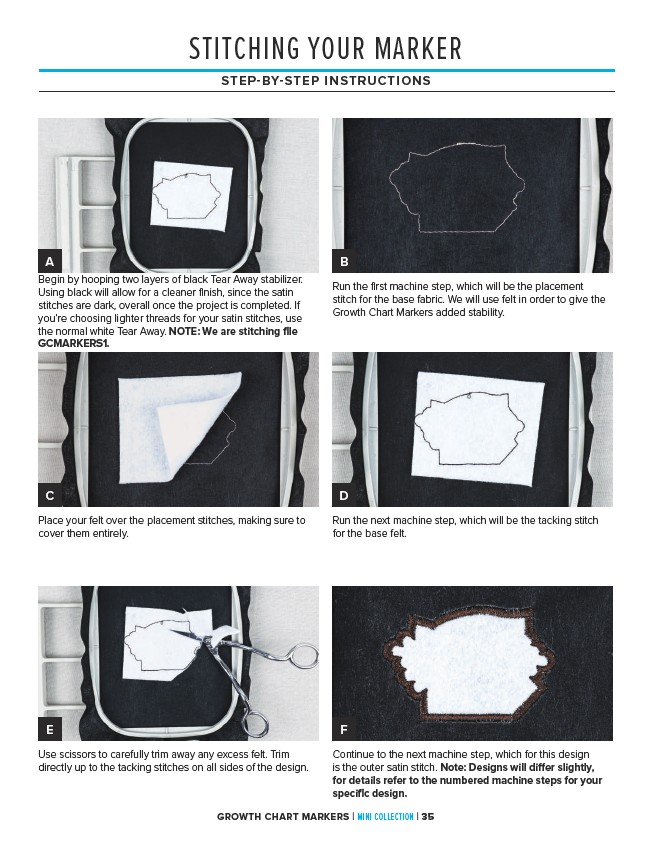
A B
Run the first machine step, which will be the placement
stitch for the base fabric. We will use felt in order to give the
Growth Chart Markers added stability.
Begin by hooping two layers of black Tear Away stabilizer.
Using black will allow for a cleaner finish, since the satin
stitches are dark, overall once the project is completed. If
you’re choosing lighter threads for your satin stitches, use
the normal white Tear Away. NOTE: We are stitching file
GCMARKERS1.
C D
Place your felt over the placement stitches, making sure to
cover them entirely.
Run the next machine step, which will be the tacking stitch
for the base felt.
E F
Use scissors to carefully trim away any excess felt. Trim
directly up to the tacking stitches on all sides of the design.
Continue to the next machine step, which for this design
is the outer satin stitch. Note: Designs will differ slightly,
for details refer to the numbered machine steps for your
specific design.
GROWTH CHART MARKERS | MINI COLLECTION | 35