M N
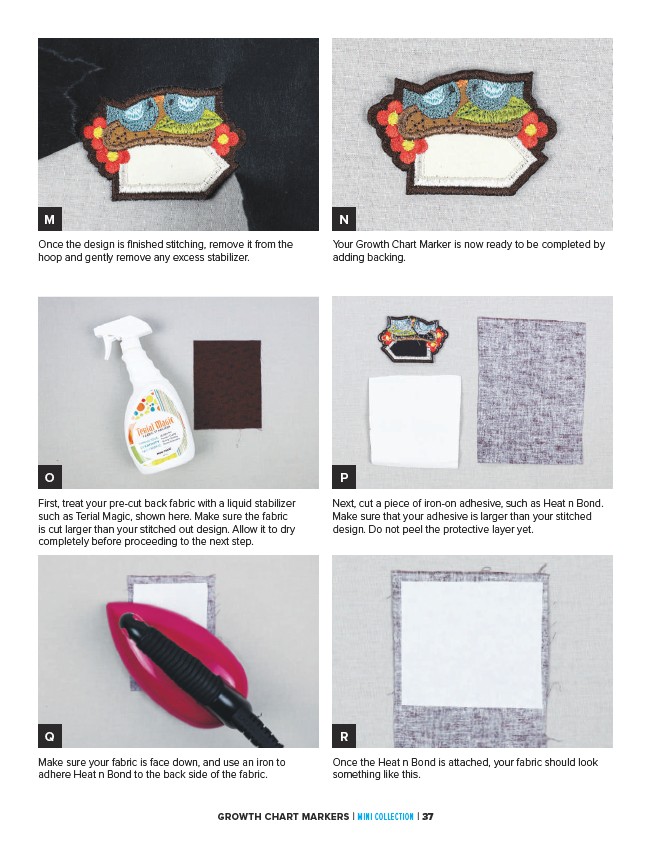
Once the design is finished stitching, remove it from the
hoop and gently remove any excess stabilizer.
O P
First, treat your pre-cut back fabric with a liquid stabilizer
such as Terial Magic, shown here. Make sure the fabric
is cut larger than your stitched out design. Allow it to dry
completely before proceeding to the next step.
Q R
Make sure your fabric is face down, and use an iron to
adhere Heat n Bond to the back side of the fabric.
Your Growth Chart Marker is now ready to be completed by
adding backing.
Next, cut a piece of iron-on adhesive, such as Heat n Bond.
Make sure that your adhesive is larger than your stitched
design. Do not peel the protective layer yet.
Once the Heat n Bond is attached, your fabric should look
something like this.
GROWTH CHART MARKERS | MINI COLLECTION | 37