STEP-BY-STEP INSTRUCTIONS
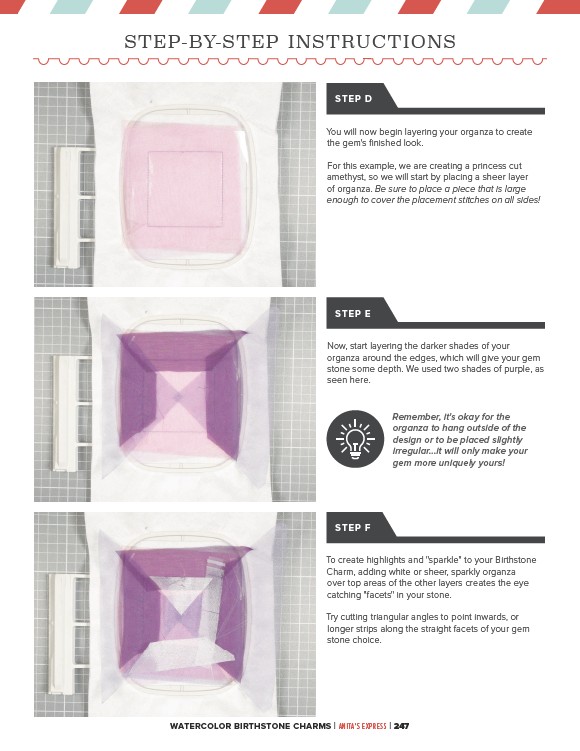
STEP D
You will now begin layering your organza to create
the gem's finished look.
For this example, we are creating a princess cut
amethyst, so we will start by placing a sheer layer
of organza. Be sure to place a piece that is large
enough to cover the placement stitches on all sides!
STEP E
Now, start layering the darker shades of your
organza around the edges, which will give your gem
stone some depth. We used two shades of purple, as
seen here.
STEP F
Remember, it's okay for the
organza to hang outside of the
design or to be placed slightly
irregular...it will only make your
gem more uniquely yours!
To create highlights and "sparkle" to your Birthstone
Charm, adding white or sheer, sparkly organza
over top areas of the other layers creates the eye
catching "facets" in your stone.
Try cutting triangular angles to point inwards, or
longer strips along the straight facets of your gem
stone choice.
WATERCOLOR BIRTHSTONE CHARMS | ANITA'S EXPRESS | 247