BLOCKS & BORDERS
APPLIQUÉ BLOCK STEP-BY-STEP
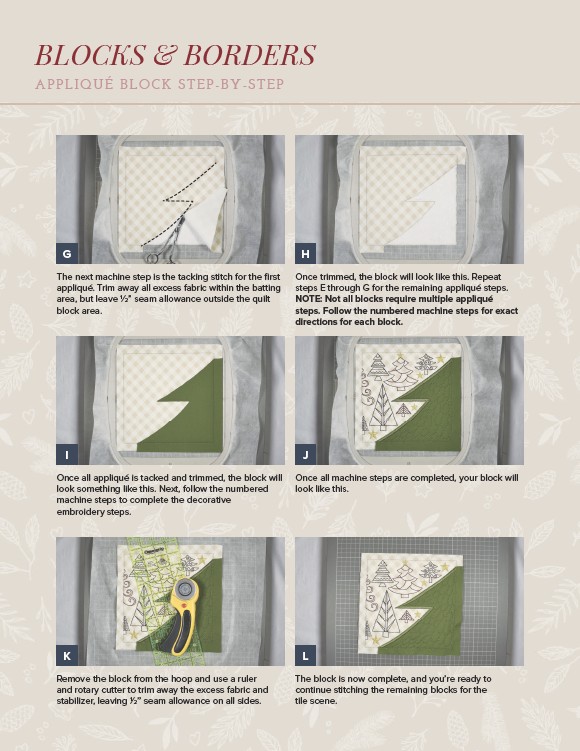
The next machine step is the tacking stitch for the first
appliqué. Trim away all excess fabric within the batting
area, but leave 1⁄2” seam allowance outside the quilt
block area.
Once all appliqué is tacked and trimmed, the block will
look something like this. Next, follow the numbered
machine steps to complete the decorative
embroidery steps.
Remove the block from the hoop and use a ruler
and rotary cutter to trim away the excess fabric and
stabilizer, leaving 1⁄2” seam allowance on all sides.
Once trimmed, the block will look like this. Repeat
steps E through G for the remaining appliqué steps.
NOTE: Not all blocks require multiple appliqué
steps. Follow the numbered machine steps for exact
directions for each block.
Once all machine steps are completed, your block will
look like this.
The block is now complete, and you’re ready to
continue stitching the remaining blocks for the
tile scene.
G
I
K
H
J
L